Do you dream of truly crispy, perfectly golden granola that satisfies every crunch craving, without the excessive sugar often found in store-bought varieties? I know I do! Achieving that elusive, extra-crispy texture in homemade granola can feel like a culinary quest. Many recipes promise, but few deliver the consistent, satisfying crunch we all desire. This article is your guide to making the best low-sugar, extra-crispy homemade granola you have ever tasted, using a unique method that guarantees success every time.
Why You’ll Love This Extra-Crispy Granola Recipe
This isn’t just another granola recipe; it’s the secret to undeniably crisp, low-sugar homemade granola, thanks to a specific two-stage baking temperature cycle and a hint of apple cider vinegar.
My unique two-stage baking approach is a game-changer. The initial lower temperature slowly dehydrates the oats and other ingredients, ensuring they dry out thoroughly. Then, a slight increase in temperature crisps everything to perfection, promoting a beautiful, deep golden color without any burning. The small addition of apple cider vinegar enhances this process by contributing to deeper caramelization and an even more satisfying crispness. It is truly a secret weapon for crunchy texture.
You will love the satisfyingly crunchy texture this method creates. It is wholesome and nourishing, making it a perfect healthy snack or breakfast. This granola is highly customizable to your taste preferences, allowing you to create your ideal mix. It is perfect for meal prep, ensuring you always have a delicious and healthy option on hand. Best of all, it is significantly better than anything you can buy at the store, both in flavor and crispness.
Ingredients Needed for Your Perfect Granola
- 3 cups old-fashioned rolled oats (certified gluten-free if desired)
- 1/2 cup raw almonds, roughly chopped
- 1/4 cup pumpkin seeds
- 1/4 cup sunflower seeds
- 1/4 cup pure maple syrup
- 2 tablespoons melted coconut oil
- 1 teaspoon vanilla extract
- 1/2 teaspoon ground cinnamon
- 1/4 teaspoon fine sea salt
- 1 teaspoon apple cider vinegar (ACV)
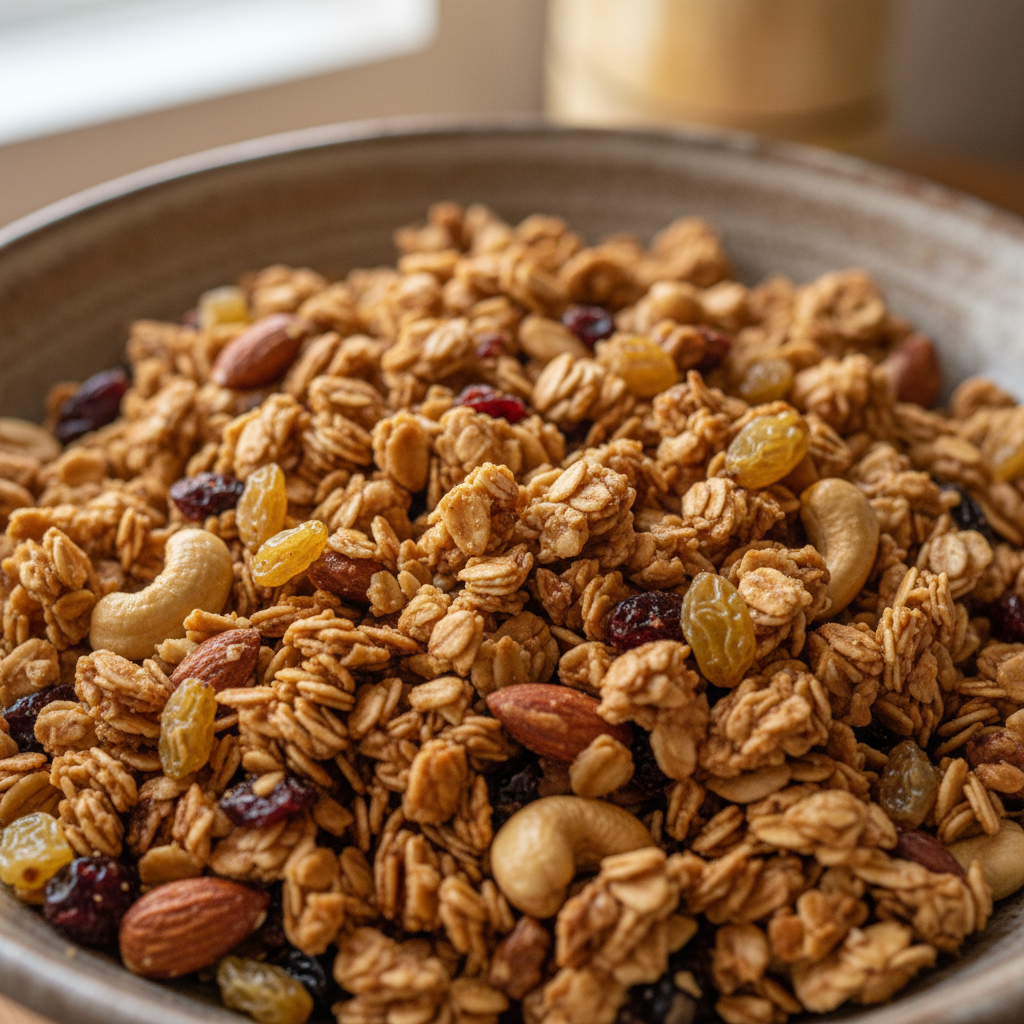
- 1/2 cup dried cranberries or raisins (add after baking)
Ingredient Notes & Smart Substitutions
For the best texture in your homemade granola, old-fashioned rolled oats are absolutely crucial. Avoid quick or instant oats, as they tend to become mushy and lack that desirable chewy crunch. If you need gluten-free granola, simply choose certified gluten-free oats.
Maple syrup provides a natural sweetness and also plays a vital role in helping the granola crisp up. This recipe is designed to be low sugar, but you can always adjust the amount slightly to your personal preference. Honey or agave nectar can also be used, though maple syrup offers a distinct flavor.
Coconut oil not only adds a lovely flavor but also contributes to the crispness. If you prefer, a neutral oil like olive oil or avocado oil can be used as an alternative.
Feel free to get creative with your mix-ins! Almonds, pumpkin seeds, and sunflower seeds add fantastic flavor and crunch. Remember, any delicate additions like dried fruit or chocolate chips should always be added after baking to prevent them from burning or becoming overly hard.
The secret ingredient, apple cider vinegar, might surprise you. It plays a subtle but important role in enhancing the caramelization process, which gives the granola a deeper flavor and contributes to its extra crispness.
How to Make Extra-Crispy Homemade Granola
Phase 1: Preparation and Mixing
Begin by preheating your oven to 250°F (120°C). Line a large baking sheet with parchment paper; this will prevent sticking and make cleanup a breeze.
In a spacious mixing bowl, combine the old-fashioned rolled oats, chopped raw almonds, pumpkin seeds, sunflower seeds, ground cinnamon, and fine sea salt. Give these dry ingredients a good stir to ensure they are well-mixed.
In a separate smaller bowl, whisk together the pure maple syrup, melted coconut oil, vanilla extract, and the special touch of apple cider vinegar. This creates your flavorful wet mixture.
Pour the wet ingredients over the dry ingredients. Stir thoroughly until every oat and nut is evenly coated with the sticky, fragrant mixture. You want to see everything glossy and well-distributed.
Spread the granola mixture onto your prepared baking sheet in a single, even layer. This even distribution is key for consistent baking and crispness. Avoid overcrowding the baking sheet; use two if necessary.
Phase 2: Two-Stage Baking for Ultimate Crispness
Bake the granola for 45 minutes at 250°F (120°C). During this first stage, stir the granola once halfway through to promote even drying.
After the initial 45 minutes, increase the oven temperature to 300°F (150°C).
Continue to bake for another 20-25 minutes at 300°F (150°C). During this second bake, resist the urge to stir! Not stirring during this phase is crucial for forming those lovely granola clusters. Keep a close eye on it; the granola will turn a beautiful golden brown and fill your kitchen with a warm, fragrant aroma.
Phase 3: Cooling and Finishing
Once the granola looks golden and feels relatively dry, remove the baking sheet from the oven. This is another critical step for achieving maximum crispness. Let the granola cool completely and undisturbed on the baking sheet for at least 1-2 hours, or until it is fully crisp to the touch. It will crisp up significantly as it cools.
Once it is completely cool, break the granola into your desired clusters. Now is the time to stir in any delicate additions like dried cranberries or raisins, if you are using them.
Store your finished homemade granola in an airtight container at room temperature to maintain its crunch.
Gap-Filling Section(s): Master Your Granola
Unlock the Ultimate Crunch: Mastering Granola Baking
Achieving that perfect, extra-crispy granola without any burnt bits is a skill, and my unique method tackles this common challenge head-on. The two-stage baking temperature cycle is specifically designed to prevent burning while ensuring every piece is uniformly crisp. The initial lower temperature gently dehydrates the oats and other ingredients, removing moisture without scorching. Then, the slightly higher temperature quickly crisps and caramelizes the granola, giving it that golden brown color and satisfying crunch.
The subtle addition of apple cider vinegar further enhances this process. It helps create a deeper caramelization, which translates to a more robust flavor and an even crispier granola texture. To ensure success, always spread your granola evenly on a parchment paper-lined baking sheet. This ensures consistent heat distribution. Maintaining a stable oven temperature is also vital. Finally, allowing the crispy granola to cool completely and undisturbed on the baking sheet is key for forming those coveted clusters and locking in maximum crunch.
Customizing Your Homemade Granola: Dietary & Flavor Options
One of the best parts of making homemade granola is the ability to customize it for various dietary needs and flavor preferences. This recipe serves as an excellent base for many adaptations.
For those with gluten sensitivities, simply use certified gluten-free oats. These are widely available and ensure your gluten-free granola is safe and delicious.
If you need nut-free granola, easily substitute the almonds with an equal amount of additional seeds, such as extra pumpkin seeds, sunflower seeds, or even sesame seeds. You could also add some puffed rice cereal for texture.
This recipe is naturally low sugar, a healthier alternative to many store-bought options. If you prefer it even less sweet, you can slightly reduce the maple syrup. Conversely, for a touch more sweetness, a small increase won’t compromise the crispness. Other sweeteners like honey or agave work well too, if you prefer their flavor profiles.
Beyond dietary needs, the flavor possibilities are endless. Consider adding a pinch of cardamom or nutmeg along with the cinnamon for different spice notes. A splash of almond extract or orange zest can also add wonderful aromatics. Remember to add delicate mix-ins like chocolate chips, different types of dried fruit (cherries, apricots), or shredded coconut after the granola has fully cooled to prevent burning or melting.
Wholesome Goodness: Nutritional Highlights
This homemade granola isn’t just delicious; it is packed with wholesome goodness. The foundation of old-fashioned oats provides an excellent source of whole grains and dietary fiber, which is essential for digestive health and sustained energy.
The coconut oil, nuts, and seeds contribute healthy fats, which are important for nutrient absorption and overall well-being. These ingredients also offer a good dose of protein, helping you feel fuller for longer.
With natural sweetness from maple syrup and a controlled amount of added sugar, this recipe stands out as a healthy snack. It is a far better choice than many commercial granolas that often hide excessive amounts of refined sugars. Enjoy this low sugar granola knowing you are fueling your body with quality ingredients.
Pro Tips & Troubleshooting for Granola Success
Pro Tips for the Best Granola
Always use old-fashioned rolled oats for that ideal chewy and crispy texture in your granola.
Do not overcrowd the baking sheet. If your batch is too large for a single even layer, use two baking sheets.
Allow the granola to cool completely and undisturbed on the baking sheet. This is the secret to achieving maximum crispness and those desired clusters.
Add delicate mix-ins like dried fruit, chocolate chips, or shredded coconut only after the granola has fully cooled to prevent burning or melting.
For a richer flavor, consider lightly toasting your nuts and seeds separately before incorporating them into the granola mixture.
Ensure all dry ingredients are evenly coated with the wet mixture for uniform crispness and flavor throughout.
Trust your oven. Baking times can vary slightly, so pay attention to the color and aroma of your granola.
Common Mistakes to Avoid
Using quick or instant oats is a common pitfall. They simply do not provide the structural integrity needed and will result in a mushy texture.
Stirring the granola during the second, higher-temperature bake is a mistake if you want clusters. This disrupts the bonding process.
Baking at too high an oven temperature for too long can lead to burnt granola. The two-stage baking method prevents this.
Storing granola before it is completely cool traps moisture, which will inevitably make your crispy granola turn soft and lose its crunch.
Overcrowding the baking sheet prevents even heat distribution, leading to some areas being soggy and others potentially burnt.
Adding dried fruit or other delicate mix-ins before baking is a no-go. They will burn and become unpleasantly hard.
Not spreading the mixture in a truly even layer means inconsistent baking, with some parts undercooked and others overcooked.
Serving & Storage
Delicious Serving Ideas
This extra-crispy granola is wonderfully versatile. I love to enjoy it with a dollop of creamy Greek yogurt and a handful of fresh berries for a truly satisfying breakfast.
It also makes a fantastic crunchy topping for smoothie bowls or a warm bowl of oatmeal, adding both texture and flavor.
Pour your favorite milk over it for a wholesome breakfast cereal that is far superior to anything from a box.
Of course, it is perfect by the handful as a satisfying healthy snack whenever hunger strikes. You can also sprinkle it over fruit crumbles or use it in parfaits.
Storage and Make-Ahead Tips
To preserve the maximum crunch of your homemade granola, proper storage is key. Always ensure the granola is completely cool before storing it. Any residual warmth can create condensation inside the container, leading to a soggy granola.
Transfer your fully cooled crispy granola to an airtight container. Store it at room temperature, ideally in a cool, dark pantry. Properly stored, it will maintain its crispness and fresh flavor for up to 2-3 weeks.
This recipe is excellent for meal prep. Make a large batch on the weekend, and you will have healthy snacks and breakfast toppings ready to go throughout the busy week.
Conclusion
You now have the definitive guide to crafting truly extra-crispy, low-sugar homemade granola. My unique two-stage baking method, combined with that special hint of apple cider vinegar, ensures a texture and flavor that will elevate your breakfast and snack game. You will find this granola to be incredibly satisfying, wholesome, and completely customizable.
Even if you are new to making homemade granola, I am confident you will achieve perfect results with this reliable recipe. Do not hesitate to experiment with different spices or mix-ins to make it uniquely yours. I encourage you to whip up a batch soon and savor the unparalleled crunch and flavor. Share your homemade granola creations with your friends and family!
Frequently Asked Questions (FAQ)
Q: How do I achieve perfect granola clusters?
A: The key to perfect clusters lies in two main steps. First, ensure the granola mixture is spread evenly in a single layer. Second, and most importantly, avoid stirring the granola during the second, higher-temperature baking phase. Once baked, let it cool completely and undisturbed on the baking sheet before breaking it apart.
Q: What’s the best way to store homemade granola for maximum crispness?
A: To maintain its crispness, ensure your homemade granola is completely cool before storing. Then, transfer it to an airtight container and keep it at room temperature. Stored this way, it will remain fresh and crispy for 2-3 weeks.
Q: Can I use different types of sweeteners in this recipe?
A: Yes, you can. While pure maple syrup is recommended for its flavor and aid in crisping, honey or agave nectar can be used as alternatives. You might need to adjust the quantity slightly to match your desired sweetness level, as this is designed as a low sugar recipe.
Q: How can I make this recipe nut-free or gluten-free?
A: To make gluten-free granola, simply use certified gluten-free old-fashioned rolled oats. For a nut-free granola, substitute the almonds entirely with more seeds, such as extra pumpkin seeds or sunflower seeds. You could also include puffed rice cereal for added texture.
Q: What is the nutritional value of this low-sugar granola?
A: This homemade granola is a healthy snack option. It is rich in dietary fiber and whole grains from the old-fashioned oats, healthy fats from the coconut oil, nuts, and seeds, and contains natural sweetness from maple syrup. It is significantly lower in added sugar compared to many store-bought granolas, making it a nourishing choice.
Q: Can I add chocolate chips to my homemade granola?
A: Absolutely! Chocolate chips are a delightful addition. However, always add them *after* the granola has cooled completely to prevent them from melting and creating a mess or burning.
Q: Why does my granola sometimes burn or not get crispy?
A: This is a common issue often caused by baking at too high an oven temperature for too long, overcrowding the baking sheet, or not allowing the granola to cool completely and undisturbed. Our two-stage baking method helps prevent burning while ensuring ultimate crispness.
“`
Extra-Crispy Homemade Granola (Low Sugar, Easy Recipe!)
Ingredients
Equipment
Method
- Begin by preheating your oven to 250°F (120°C). Line a large baking sheet with parchment paper; this will prevent sticking and make cleanup a breeze.
- In a spacious mixing bowl, combine the old-fashioned rolled oats, chopped raw almonds, pumpkin seeds, sunflower seeds, ground cinnamon, and fine sea salt. Give these dry ingredients a good stir to ensure they are well-mixed.
- In a separate smaller bowl, whisk together the pure maple syrup, melted coconut oil, vanilla extract, and the special touch of apple cider vinegar. This creates your flavorful wet mixture.
- Pour the wet ingredients over the dry ingredients. Stir thoroughly until every oat and nut is evenly coated with the sticky, fragrant mixture. You want to see everything glossy and well-distributed.
- Spread the granola mixture onto your prepared baking sheet in a single, even layer. This even distribution is key for consistent baking and crispness. Avoid overcrowding the baking sheet; use two if necessary.
- Bake the granola for 45 minutes at 250°F (120°C). During this first stage, stir the granola once halfway through to promote even drying.
- After the initial 45 minutes, increase the oven temperature to 300°F (150°C).
- Continue to bake for another 20-25 minutes at 300°F (150°C). During this second bake, resist the urge to stir! Not stirring during this phase is crucial for forming those lovely granola clusters. Keep a close eye on it; the granola will turn a beautiful golden brown and fill your kitchen with a warm, fragrant aroma.
- Once the granola looks golden and feels relatively dry, remove the baking sheet from the oven. This is another critical step for achieving maximum crispness. Let the granola cool completely and undisturbed on the baking sheet for at least 1-2 hours, or until it is fully crisp to the touch. It will crisp up significantly as it cools.
- Once it is completely cool, break the granola into your desired clusters. Now is the time to stir in any delicate additions like dried cranberries or raisins, if you are using them.
- Store your finished homemade granola in an airtight container at room temperature to maintain its crunch.
Notes
Printable Recipe Card
Want just the essential recipe details without scrolling through the article? Get our printable recipe card with just the ingredients and instructions.