Skip to content
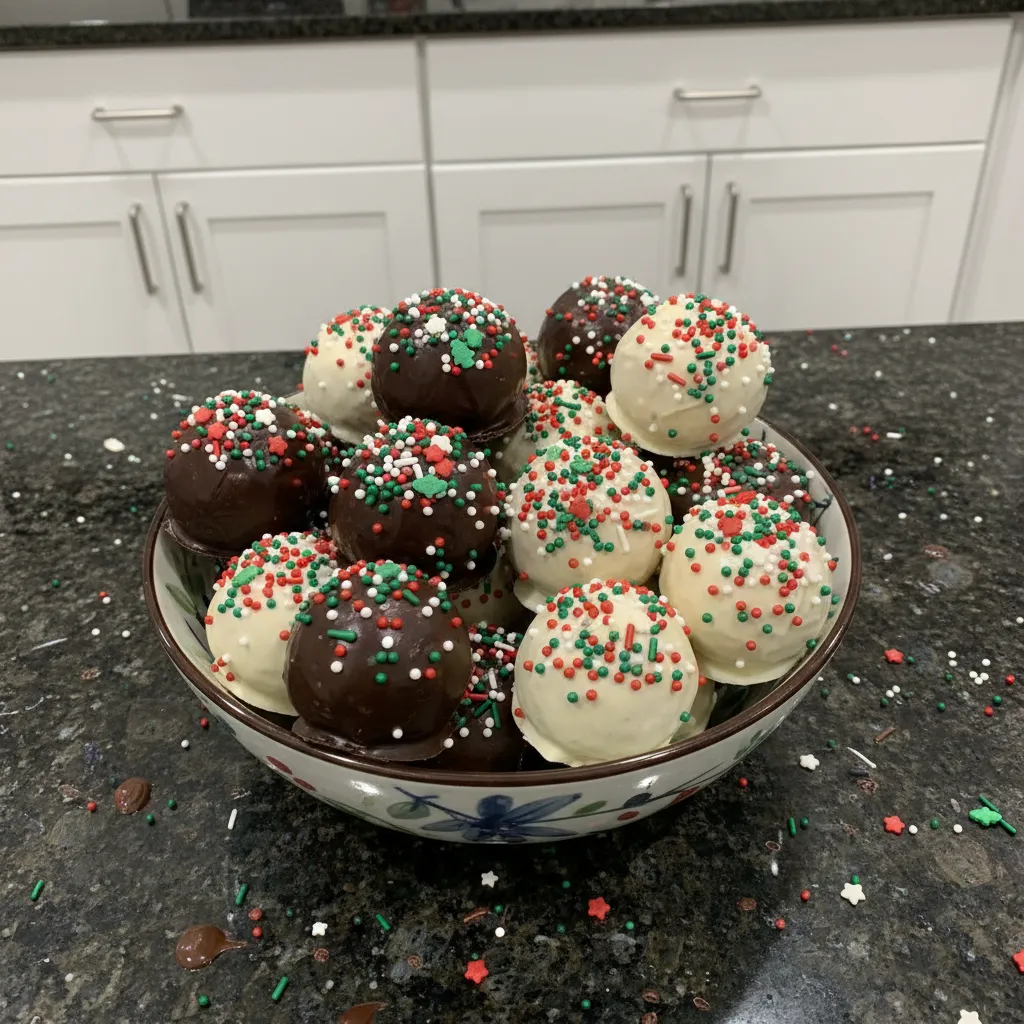
 The holiday season just isn’t complete without a spread of delightful, easy-to-make treats, and my kitchen’s absolute favorite has to be this incredible Christmas Oreo balls recipe. These no-bake wonders are a quintessential holiday indulgence, perfect for last-minute party contributions, charming edible gifts, or simply a fun activity with the family. Get ready to impress everyone with these fudgy, rich, and refreshingly festive truffles, as I guide you through creating flawless Oreo truffles with a special, unique twist.
Why You’ll Love This Recipe
In my culinary journey, I’ve found that the best recipes combine simplicity with an unforgettable flavor. This recipe for Christmas Oreo balls takes a beloved classic and elevates it with a secret ingredient: a whisper of pure peppermint extract.
- A Classic Holiday Duo: Peppermint and chocolate are a match made in heaven, especially during the festive season. The refreshing coolness of peppermint provides a dynamic contrast to the rich sweetness of the chocolate and cream cheese, transforming a simple dessert into a truly distinct holiday treat.
- Effortlessly Elegant: These no-bake dessert truffles come together quickly with minimal fuss, making them ideal for busy holiday schedules.
- Family-Friendly Fun: From crushing Oreos to rolling balls and decorating, this recipe offers opportunities for everyone to get involved, making it a cherished part of your holiday baking traditions.
- Budget-Conscious Brilliance: Using readily available ingredients, this recipe delivers impressive results without breaking the bank.
- Perfect for Gifting: Beautifully coated and adorned, these festive treat balls make for impressive edible gifts or a stunning addition to any holiday platter.
Ingredients Needed

Gathering your ingredients is the first step to creating these delightful Oreo truffles. Here’s exactly what you’ll need for this Christmas Oreo balls recipe:
- 36 oreos
- 8 oz cream cheese, softened
- 10 oz Ghiradelli Dark chocolate melting wafers
- 10 oz Ghiradelli White vanilla melting wafers
- Christmas sprinkles
- 1/4 teaspoon pure peppermint extract (my unique twist!)
Ingredient Notes & Substitutions
Understanding your ingredients is key to success, so let’s delve into some essential details and possible swaps:
- Oreos: A standard “family size” package typically contains enough cookies for 36 Oreos, ensuring you have the perfect base for your Oreo truffles. Feel free to experiment with different Oreo flavors like Mint Oreos for an extra peppermint punch, or Golden Oreos for a vanilla twist. For those with dietary needs, gluten-free Oreo alternatives work perfectly.
- Cream Cheese: The absolute most critical step here is using fully softened cream cheese. This prevents lumps and ensures a smooth, uniformly combined mixture that’s easy to roll. I always recommend full-fat cream cheese for the best fudgy texture. For a dairy-free option, many excellent plant-based cream cheeses are available and will work well.
- Melting Wafers: I specifically recommend Ghirardelli Dark chocolate melting wafers and Ghirardelli White vanilla melting wafers for their superior melting consistency and smooth, glossy finish, making dipping a breeze. If melting wafers aren’t available, you can use regular chocolate chips. Just add about a teaspoon of coconut oil or shortening per cup of chocolate chips when melting to help achieve a smoother consistency suitable for dipping. Different colored candy melts can also add fun variations!
- Peppermint Extract: This is our unique twist for that incredible festive treat flavor! Be sure to use pure peppermint extract for the most authentic and vibrant taste. A little goes a long way, so stick to the recommended amount.

How to Make Peppermint Christmas Oreo Balls
Creating these festive peppermint Christmas Oreo balls is a joyful process. Follow these steps for perfect, fudgy truffles every time!
Step 1: Crush Your Oreos
Begin by adding all 36 Oreos to a food processor. Process them until they become fine, uniform crumbs. If you don’t have a food processor, no worries! Place the Oreos in a sturdy Ziploc bag, seal it, and use a rolling pin to crush them into fine crumbs. The finer the crumbs, the smoother your truffle base will be.
Step 2: Combine with Cream Cheese and Peppermint
Add the 8 oz of fully softened cream cheese to the food processor with the Oreo crumbs. This is also where we’ll add our unique twist: 1/4 teaspoon of pure peppermint extract. Pulse the mixture until it’s just combined. You’re looking for the ingredients to start coming together, but not overmix.
Step 3: Final Mix for Fudgy Texture
Transfer the Oreo ball mixture to a medium bowl. Use a sturdy rubber spatula to thoroughly combine the Oreos with the cream cheese. This ensures a uniformly mixed, smooth, and fudgy dough for your truffle consistency, without overworking it and creating too much heat from your hands.
Step 4: Form the Balls
Line a baking sheet with parchment paper. Using a 1.5-tablespoon mini cookie scoop helps create uniform portions. Scoop the mixture onto the parchment-lined baking sheet, then roll each portion between your palms into smooth, compact balls. The warmth of your hands will help them smooth out beautifully.
Step 5: Crucial Chill Time
Place the formed Oreo truffles in the fridge or freezer for at least 30 minutes. This chill time is absolutely crucial! It firms up the balls, preventing them from crumbling or becoming too soft and messy during the dipping process. Do not skip this step!
Step 6: Melt Dark Chocolate
Gently melt the 10 oz of Ghirardelli Dark chocolate melting wafers until smooth and glossy. You can do this in the microwave in 30-second intervals, stirring thoroughly after each, or using a double boiler method for more precise control. Be careful not to overheat the chocolate, which can cause it to seize.
Step 7: Dip & Decorate (Dark Chocolate)
Take half of the chilled Oreo balls from the fridge. Dip each ball into the smooth dark chocolate, ensuring it’s fully coated. Allow any excess chocolate to drip off by gently tapping the ball against the side of the bowl or fork. Immediately after dipping, while the chocolate is still wet, top generously with Christmas sprinkles. Place the dipped truffles back on the parchment-lined baking sheet.
Step 8: Melt White Chocolate
Gently melt the 10 oz of Ghirardelli White vanilla melting wafers using the same careful method as the dark chocolate until perfectly smooth.
Step 9: Dip & Decorate (White Chocolate)
Dip the remaining half of the Oreo balls into the melted white chocolate, allowing excess to drip off. Again, immediately top with festive Christmas sprinkles before the chocolate sets. Return them to the parchment-lined baking sheet.
Step 10: Final Set
Chill all the dipped Oreo balls in the fridge until the chocolate coating is completely firm and set. This will take about 15-30 minutes, ensuring a neat, non-sticky finish for your Christmas Oreo balls.
Mastering Chocolate Dipping & Creative Toppings
Achieving that glossy, perfectly coated finish on your Oreo truffles is easier than you think with a few expert tricks. And why stop at sprinkles when there’s a world of festive toppings to explore?
Perfect Chocolate Coating Techniques
Melting chocolate can feel intimidating, but with the right approach, you’ll get a beautiful, smooth coating every time. For microwave melting, place your melting wafers in a microwave-safe bowl and heat on 50% power for 30-second intervals, stirring thoroughly after each. Continue until mostly melted, then stir until completely smooth and glossy from residual heat. Avoid overheating! For a double boiler method, place a heatproof bowl over a saucepan of simmering water (make sure the water doesn’t touch the bottom of the bowl). Stir constantly until melted. Always use completely dry utensils, as even a tiny drop of water can cause chocolate to seize and become thick and grainy.
The ideal temperature for dipping chocolate is around 90-92°F (32-33°C) for dark chocolate and slightly lower for white. Keeping the chocolate warm during dipping can be done by using a smaller bowl over a bowl of warm (not hot) water, or by reheating briefly in the microwave. If your chocolate becomes slightly too thick while dipping, add a tiny bit (1/4 to 1/2 teaspoon) of coconut oil or shortening and stir vigorously until smooth again. Different colored candy melts can also add fun variations! For another delightful chocolate treat, consider making this Dubai chocolate bar recipe.
Beyond Sprinkles: Festive Topping Ideas
While Christmas sprinkles are classic, don’t limit your creativity! Here are some other wonderful ideas to adorn your Christmas Oreo balls:
- Chopped Nuts: Finely chopped pecans, pistachios, or almonds add a lovely textural contrast and rich flavor.
- Edible Glitter or Luster Dust: For an extra touch of sparkle, brush or sprinkle edible gold or silver glitter onto the still-wet chocolate.
- Drizzled Contrasting Chocolate: After the main coating sets, drizzle melted white chocolate over dark-dipped balls, or dark chocolate over white-dipped ones, for an elegant look.
- Mini Chocolate Chips: Press mini chocolate chips onto the sides of the truffles.
- Cocoa Powder: For a sophisticated, less sweet option, dust some truffles with high-quality cocoa powder or powdered sugar.
- Crushed Candy Canes: For an extra peppermint punch, a sprinkling of crushed candy canes on top of the peppermint-infused truffles is always a hit!
Remember, always apply toppings immediately after dipping the truffle, while the chocolate coating is still wet, to ensure proper adhesion.
Perfect Truffle Consistency: Troubleshooting Sticky & Crumbly Mixtures
When making Oreo truffles, sometimes the mixture doesn’t come out perfectly. Don’t worry, these common issues are easily fixed!
When Your Mixture is Too Sticky
An overly sticky truffle mixture can be frustrating to roll. This usually happens if there’s slightly too much cream cheese or not enough chilling time for the mixture. To fix it, gradually add a small amount of extra crushed Oreos (you can quickly pulse a few more in your food processor) or even a neutral cookie crumb until you achieve a consistency that is firm enough to roll without sticking excessively to your hands.
When Your Mixture is Too Crumbly
If your Oreo ball mixture is too crumbly and won’t hold together when rolled, it’s often because the cream cheese was too cold, or there were too many Oreos compared to the cream cheese. To remedy this, add a tiny bit more softened cream cheese, about a teaspoon at a time, or even a splash of milk or heavy cream until the mixture comes together and is easily rollable.
The Cream Cheese Temperature Factor
The importance of cream cheese temperature for optimal mixture consistency cannot be overstated! Your cream cheese absolutely must be genuinely softened to room temperature. This means taking it out of the fridge at least an hour, if not two, before you plan to mix. Cold cream cheese won’t incorporate smoothly, leading to lumps and a crumbly mixture. If it’s too warm, it can make the mixture overly sticky. Softened cream cheese blends effortlessly with the crushed Oreos, creating that perfect, fudgy truffle base we’re after. One of the most common mistakes I see is not softening the cream cheese enough! For another delightful dessert that uses cream cheese, try these churro cheesecake bars.
Pro Tips & Troubleshooting
After years in the kitchen, I’ve gathered a few invaluable tricks and learned from common pitfalls. Here are my top tips for ensuring your Christmas Oreo balls are nothing short of perfection.
Pro Tips for Perfect Oreo Balls
- Don’t Skip the Chill: I cannot stress this enough – chilling your Oreo truffles for at least 30 minutes before dipping is absolutely crucial. This firms them up, allowing them to hold their shape beautifully and preventing a messy coating experience.
- Softened Cream Cheese is Key: Always, always use room temperature, softened cream cheese. This guarantees a smooth, lump-free mixture that’s easy to work with and results in the best fudgy texture.
- Act Fast with Toppings: Add your Christmas sprinkles or other desired toppings immediately after dipping each ball in chocolate, before the coating has a chance to set. This ensures they adhere properly.
- For the Peppermint Punch: To truly enhance our unique peppermint twist, consider a tiny additional sprinkle of crushed candy cane on top of the peppermint-infused truffles. Just ensure the peppermint extract is thoroughly mixed into the Oreo base.
- Serving Temperature: For the best taste and texture, serve these Christmas Oreo balls chilled. While they’re stable at room temperature for a short period, they truly shine when cool. Do not leave them out for more than two hours.
- Batch Dipping: To keep your truffles firm, dip a few balls at a time while leaving the rest chilled. Return them to the fridge if they start to soften while you’re working.
Common Mistakes to Avoid
- Lumpy Mixture: Not softening your cream cheese enough before mixing is the primary culprit behind a hard-to-combine, lumpy mixture. Plan ahead!
- Messy Dipping: Skipping that vital chilling step before dipping inevitably leads to soft, misshapen, and messy truffles. Patience is a virtue here.
- Seized Chocolate: Overheating your dipping chocolate or introducing even a tiny bit of water can cause it to seize, making it thick, grainy, and unusable. Refer to my proper melting techniques covered earlier.
- Uneven Coatings: Not allowing excess chocolate to drip off each truffle before placing it down can lead to thick, clumpy, and unattractive coatings. Take a moment to let that excess slide off.
Serving & Storage
These peppermint Christmas Oreo balls are not only delicious but also incredibly versatile for holiday entertaining and gifting. Here’s how to best serve and store them.
Festive Serving Ideas
- Holiday Party Staple: These truffles are a fantastic addition to any holiday party or gathering. Their festive appearance and irresistible taste make them a crowd-pleaser.
- Stunning Dessert Display: Arrange them artfully on a festive platter with other holiday treats like cookies, brownies, and candies for an eye-catching dessert display. Their contrasting colors and cheerful sprinkles will really pop.
- Perfect Pairings: Serve your Christmas Oreo balls alongside a steaming cup of coffee, rich hot chocolate, or a classic glass of cold milk. For an extra touch of elegance, garnish the platter with a few extra crushed candy canes or a sprig of fresh mint.
Storage and Make-Ahead Tips
- Refrigerator Storage: Your Christmas Oreo balls will stay wonderfully fresh for up to 2-3 weeks when stored in an airtight container in the refrigerator. Layer them with parchment paper to prevent sticking.
- Freezer Storage: Yes, you can absolutely freeze these! They can be frozen for up to 2-3 months in an airtight, freezer-safe container. To thaw, simply transfer them to the refrigerator overnight, or let them sit at room temperature for about 30-60 minutes before serving.
- Make-Ahead Advantage: Oreo balls are an excellent make-ahead dessert, especially during the busy holiday season. Prepare them a week or two in advance and store them in the fridge or freezer to save precious time closer to your event. If you’re looking for another easy and satisfying snack, try this cookies and cream popcorn recipe.
- Gift-Giving Packaging: For thoughtful gift ideas, place individual Oreo truffles into mini cupcake liners. Arrange them in decorative boxes or tins, separating layers with parchment paper to prevent sticking. This not only keeps them fresh but also ensures a beautiful presentation, making them perfect edible gifts.
Conclusion
There you have it – my tried-and-true recipe for the most delightful Peppermint Christmas Oreo Balls. With their unique festive twist and undeniable ease, these no-bake wonders are sure to become a cherished part of your holiday traditions. Whether you’re a seasoned baker or just starting out, you can achieve impressive results with these fudgy, chocolatey treats. Don’t hesitate to get creative with your toppings, share them with loved ones, or simply savor a moment of holiday bliss. I encourage you to print this recipe, share it with friends, and explore other holiday dessert recipes on my blog for more inspiration!
FAQ
How long do Christmas Oreo balls stay fresh in the refrigerator and freezer?
Your Christmas Oreo balls will remain fresh for 2-3 weeks in an airtight container in the refrigerator. For longer storage, they can be frozen for up to 2-3 months in a freezer-safe container. Thaw them overnight in the fridge or for 30-60 minutes at room temperature.
What is the best way to melt chocolate for dipping Oreo balls?
For the smoothest coating, use the microwave method (30-second intervals at 50% power, stirring between each) or a double boiler. Always use dry utensils and avoid overheating to prevent the chocolate from seizing.
How can I fix my Oreo ball mixture if it’s too sticky or too crumbly?
If too sticky, add a small amount of extra crushed Oreos until it’s rollable. If too crumbly, add a tiny bit more softened cream cheese (a teaspoon at a time) or a splash of milk until it comes together. The importance of cream cheese temperature is paramount here – ensure it’s fully softened!
Can I use different types of Oreos or other cookies for this recipe?
Absolutely! While classic Oreos are great, you can experiment with Mint Oreos for an intensified peppermint flavor, Golden Oreos for a vanilla truffle, or even gluten-free Oreos for dietary needs. Other similar wafer cookies can also be used, though the flavor profile will change.
What are some creative topping ideas for festive Christmas Oreo balls?
Beyond traditional Christmas sprinkles, consider chopped nuts (pecans, pistachios), edible glitter, contrasting chocolate drizzles (white on dark, dark on white), mini chocolate chips, or a dusting of cocoa powder. Crushed candy canes are also excellent for an extra peppermint kick!
Is it possible to prepare Christmas Oreo balls in advance?
Yes, these are an excellent make-ahead dessert! You can prepare and refrigerate them for up to 2-3 weeks, or freeze them for up to 2-3 months. This saves valuable time during the busy holiday season, making them perfect for parties and gifting.
Do I need to soften the cream cheese, and how important is it?
Yes, softening the cream cheese to room temperature is critically important. It ensures a smooth, lump-free mixture that blends easily with the Oreos, resulting in the perfect fudgy truffle consistency. Cold cream cheese will lead to a lumpy, crumbly mixture that’s hard to work with.
How many Oreos are in a standard package to get 36 cookies?
A standard “family size” package of Oreos (usually around 18.2 oz or 518g) typically contains approximately 36 cookies, which is the perfect amount needed for this Christmas Oreo balls recipe.
Can I use regular chocolate chips instead of melting wafers for dipping?
Yes, you can use regular chocolate chips. To achieve a smoother consistency similar to melting wafers for easier dipping, add about a teaspoon of coconut oil or shortening per cup of chocolate chips when you melt them. This will help prevent the chocolate from being too thick or seizing.
Peppermint Christmas Oreo Balls Recipe (No-Bake!)
Ingredients
Equipment
Method
- Begin by adding all 36 Oreos to a food processor. Process them until they become fine, uniform crumbs. If you don’t have a food processor, place the Oreos in a sturdy Ziploc bag, seal it, and use a rolling pin to crush them into fine crumbs. The finer the crumbs, the smoother your truffle base will be.
- Add the 8 oz of fully softened cream cheese to the food processor with the Oreo crumbs. This is also where we’ll add our unique twist: 1/4 teaspoon of pure peppermint extract. Pulse the mixture until it’s just combined. You’re looking for the ingredients to start coming together, but not overmix.
- Transfer the Oreo ball mixture to a medium bowl. Use a sturdy rubber spatula to thoroughly combine the Oreos with the cream cheese. This ensures a uniformly mixed, smooth, and fudgy dough for your truffle consistency, without overworking it and creating too much heat from your hands.
- Line a baking sheet with parchment paper. Using a 1.5-tablespoon mini cookie scoop helps create uniform portions. Scoop the mixture onto the parchment-lined baking sheet, then roll each portion between your palms into smooth, compact balls. The warmth of your hands will help them smooth out beautifully.
- Place the formed Oreo truffles in the fridge or freezer for at least 30 minutes. This chill time is absolutely crucial! It firms up the balls, preventing them from crumbling or becoming too soft and messy during the dipping process. Do not skip this step!
- Gently melt the 10 oz of Ghirardelli Dark chocolate melting wafers until smooth and glossy. You can do this in the microwave in 30-second intervals, stirring thoroughly after each, or using a double boiler method for more precise control. Be careful not to overheat the chocolate, which can cause it to seize.
- Take half of the chilled Oreo balls from the fridge. Dip each ball into the smooth dark chocolate, ensuring it’s fully coated. Allow any excess chocolate to drip off by gently tapping the ball against the side of the bowl or fork. Immediately after dipping, while the chocolate is still wet, top generously with Christmas sprinkles. Place the dipped truffles back on the parchment-lined baking sheet.
- Gently melt the 10 oz of Ghirardelli White vanilla melting wafers using the same careful method as the dark chocolate until perfectly smooth.
- Dip the remaining half of the Oreo balls into the melted white chocolate, allowing excess to drip off. Again, immediately top with festive Christmas sprinkles before the chocolate sets. Return them to the parchment-lined baking sheet.
- Chill all the dipped Oreo balls in the fridge until the chocolate coating is completely firm and set. This will take about 15-30 minutes, ensuring a neat, non-sticky finish for your Christmas Oreo balls.
Notes
Printable Recipe Card
Want just the essential recipe details without scrolling through the article? Get our printable recipe card with just the ingredients and instructions.