Skip to content
 There’s nothing quite like a fresh, satisfying meal that comes together quickly, and in my kitchen, these incredible grilled chicken wraps are a year-round star, especially perfect for a vibrant summer lunch or a speedy weeknight dinner. I’m excited to share my go-to recipe for creating the juiciest boneless skinless chicken wraps you’ve ever tasted, elevated by a simple yet transformative flavor twist. Get ready to master tender chicken breasts, learn expert tips for flawless results, and discover how easy it is to make these a staple for your next family meal or healthy packed lunches.
Why You’ll Love This Recipe
My quest for the ultimate grilled chicken wraps led me to a few game-changing secrets that I know you’ll adore:
- The Quick Marinade Magic: I’ve developed a unique, quick 15-minute buttermilk and hot sauce marinade that works wonders on the chicken. The scientific logic is simple yet brilliant: the lactic acid in buttermilk gently tenderizes the chicken breasts, while the hot sauce infuses a deep, vibrant flavor. This ensures every bite of your chicken cutlets is incredibly juicy and tender, not dry or bland.
- Homemade Spicy Ranch Elevation: Forget plain ranch! My simple homemade spicy ranch dressing recipe (a blend of mayo, buttermilk, spices, and a dash of hot sauce) takes these wraps to another level. This homemade ranch dressing adds a crucial extra kick and freshness, enhancing both the taste and texture for a truly incredible flavor experience.
- Flavorful & Easy: This recipe delivers a truly flavorful, easy, and quick meal that fits perfectly into even the busiest schedules. It’s maximum taste for minimal effort.
- Meal Prep Friendly: Planning ahead is a breeze! These wraps are excellent for meal prep, making them ideal for satisfying packed lunches or hassle-free picnics.
- Reliably Delicious: My method ensures you get tender and juicy chicken every single time, proactively preventing common mistakes like dry, overcooked meat.
Ingredients Needed

Here’s what you’ll need to make these sensational grilled chicken wraps:
- 2 chicken breasts (boneless and skinless, sliced into cutlets, 650g in total)
- 1 teaspoon smoked paprika
- ¼ teaspoon chili powder
- ½ teaspoon garlic granules
- ½ teaspoon salt
- ⅛ teaspoon ground black pepper
- 1 tablespoon olive oil (if frying)
- 4 flour tortilla wraps
- 4 large iceberg lettuce leaves
- 1 cup cheddar or mozzarella cheese (shredded)
- ½ cup ranch dressing
Ingredient Notes & Substitutions
- Chicken: I always recommend using high-quality boneless skinless chicken breasts. Slicing them into thin chicken cutlets ensures quicker, more even cooking and a more pleasant texture in your wrap. If you prefer, you can also use thicker chunks, just adjust cooking time accordingly.
- Buttermilk & Hot Sauce (Unique Twist): For the best results in the marinade, use full-fat buttermilk for richness. When it comes to hot sauce, feel free to use your favorite; popular options in the US like Frank’s RedHot or Tabasco work wonderfully to add that vibrant kick.
- Spices: The blend of smoked paprika, chili powder, and garlic granules creates a robust, smoky, and savory base for the chicken. The salt and ground black pepper are essential for bringing out all these flavors. Don’t be afraid to experiment with your own favorite seasoning blend if you have one!
- Tortillas: While classic flour tortilla wraps are my go-to, you can absolutely use whole wheat tortillas for added fiber or corn tortillas for a different flavor profile. Gluten-free options are also widely available and work perfectly.
- Cheese: I love the melty goodness of cheddar cheese or mozzarella cheese, but feel free to explore other shredded cheese options like provolone, pepper jack, or Monterey Jack. For a dairy-free alternative, there are many excellent plant-based shredded cheeses on the market.
- Ranch Dressing: While the recipe calls for ½ cup of standard ranch dressing for assembly, I highly encourage you to make my homemade spicy ranch dressing for that unique twist and unparalleled freshness! If you’re out of buttermilk for the dressing, a mix of sour cream and a little milk can be a good substitute.
- Vegetables: Crisp iceberg lettuce leaves provide a fantastic crunch. But for even more nutrition and flavor, feel free to add more diverse vegetable fillings like thin slices of ripe tomatoes, crisp red onions, colorful bell peppers, cucumbers, or shredded carrots.

How to Make Grilled Chicken Wraps
Here’s my step-by-step guide to crafting perfectly juicy grilled chicken wraps:
Step 1: Marinate & Season the Chicken
First, prepare your quick buttermilk and hot sauce marinade by whisking together buttermilk and a dash of your favorite hot sauce in a bowl. Add the sliced chicken cutlets, ensuring they are fully coated. While they marinate briefly (just 15 minutes is plenty!), season the chicken cutlets generously with the smoked paprika, chili powder, garlic granules, salt, and ground black pepper. The spices will adhere beautifully, forming an aromatic rub.
Step 2: Preheat Your Grill
Heat a tablespoon of olive oil in a pan, or a grill pan, or preheat your outdoor grill to medium-high heat. You want a surface hot enough to create a nice sizzle and those coveted grill marks when the chicken hits it.
Step 3: Grill the Chicken to Perfection
Carefully place the seasoned chicken cutlets on the hot grill or pan. Listen for that satisfying sizzle! Cook on both sides until the chicken is cooked through. To ensure both food safety and prevent dry chicken, always use a kitchen thermometer to confirm the internal temperature of the center of the chicken must be at least 165°F (75°C). This guarantees juicy chicken every time. Look for beautiful char and distinct grill marks.
Step 4: Rest the Chicken
Once cooked, remove the chicken from the grill and allow it to rest on a plate for 5 minutes. This crucial step helps the juices redistribute throughout the meat, ensuring your boneless skinless chicken remains incredibly juicy and tender.
Step 5: Slice the Chicken
After resting, cut the chicken up into strips or bite-sized chunks, perfect for filling your wraps. I like to slice mine thinly for even distribution.
Step 6: Assemble the Wraps
To assemble, lay out a flour tortilla wrap. Layer it with crisp iceberg lettuce leaves, followed by the juicy grilled chicken, a generous sprinkle of shredded cheese (cheddar or mozzarella are fantastic!), and a delicious drizzle of my homemade spicy ranch dressing (or your preferred ranch dressing). Aim for an even distribution across the center.
Step 7: Seal & Grill the Wrap (Optional but Recommended)
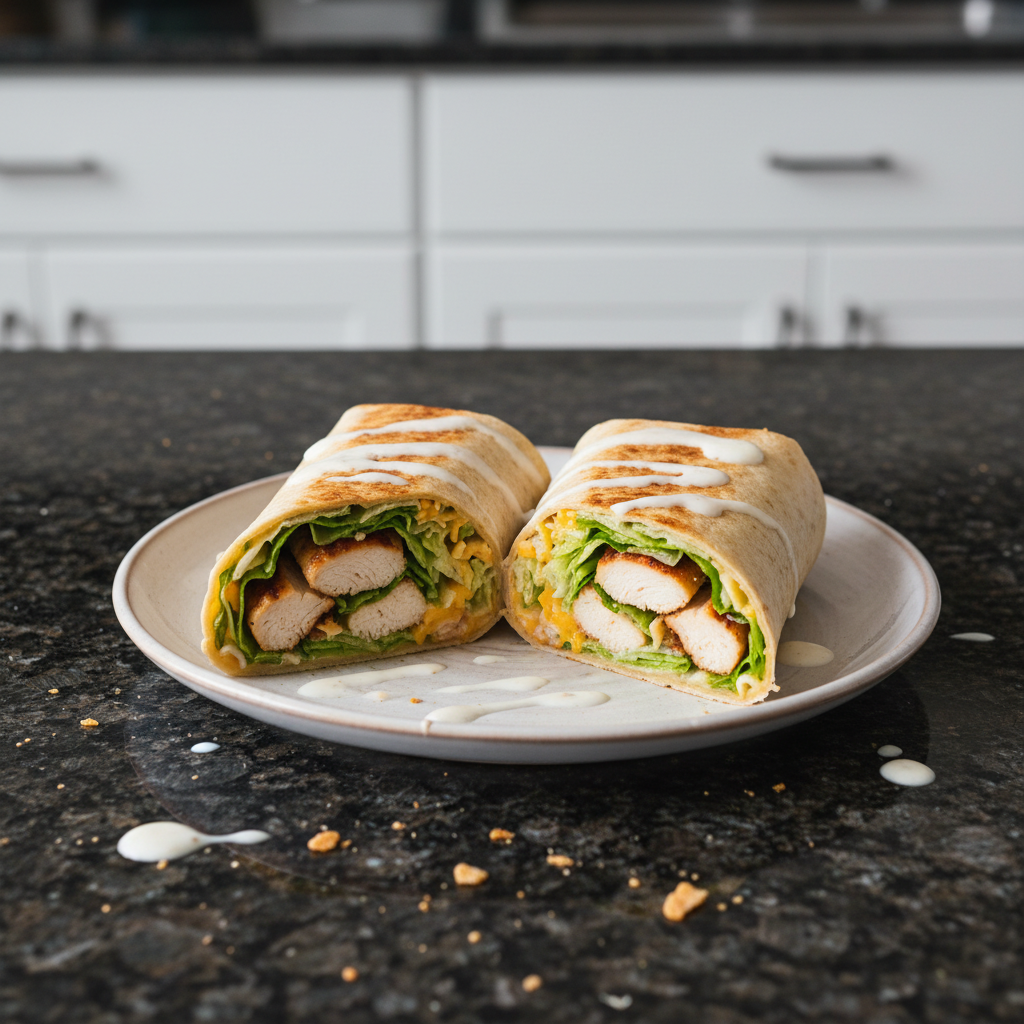
Seal the tortilla by folding in the sides, then rolling it tightly from the bottom up. For an extra touch of warmth and a slightly crispy exterior, place the assembled wrap on the grill (or lightly oiled grill pan). Cook for a minute or two on both sides until golden and slightly toasted. Remove, then slice the wraps in halves and serve immediately for the best experience.
Mastering Your Wraps: Rolling & Customizing
Creating the perfect wrap goes beyond just the ingredients; it’s about technique and personalization!
How to Roll a Perfect Wrap Every Time
A well-rolled wrap is key to preventing it from falling apart and minimizing soggy spots. Here’s my foolproof method:
- Lay your flour tortilla wraps flat. Arrange your fillings (lettuce, chicken, cheese, dressing) in a neat line just below the center, leaving space at the top and sides. Avoid overfilling!
- Take the bottom edge of the tortilla and fold it tightly up over the filling, tucking it in snugly.
- Fold in both the left and right sides of the tortilla over the filling, pulling them tight against the center.
- Continue rolling the wrap tightly upwards from the bottom. Keep it snug as you roll to create a compact, secure bundle.
With a little practice, you’ll be rolling restaurant-quality wraps. (Check out my blog for a video tutorial on achieving that perfect roll!)
Boost Your Bite: Customizable Fillings & Swaps
One of the best things about grilled chicken wraps is their versatility. Feel free to make them your own!
- More Veggies: Beyond the refreshing iceberg lettuce leaves, consider adding thin slices of ripe tomatoes, red onions, colorful bell peppers, cool cucumbers, shredded carrots, or fresh spinach for extra crunch and nutrients.
- Cheese & Dairy-Free: While cheddar cheese and mozzarella cheese are classics, try provolone, pepper jack for a spicy kick, or crumbled feta. For those avoiding dairy, many delicious plant-based shredded cheese alternatives melt beautifully.
- Dressing Variations: If you’re looking beyond my delicious spicy ranch dressing, a light vinaigrette, a sweet and tangy honey mustard, or even a smoky BBQ sauce can offer a wonderful change of pace.
- Dietary Adaptations: For a low-carb option, simply use large, crisp lettuce leaves instead of tortillas. If you need gluten-free, opt for corn or dedicated gluten-free flour tortilla wraps. Boost your fiber content by adding even more vegetables or choosing whole wheat tortillas.
Pro Tips & Troubleshooting
Even the most experienced chefs use a few tricks to ensure perfect results. Here are mine for your grilled chicken wraps:
Pro Tips for Success
- Temperature Check: Always use a kitchen thermometer to ensure chicken reaches an internal temperature of at least 165°F (75°C) for food safety and perfect doneness. This is the single best way to avoid undercooked or overcooked chicken.
- Rest the Chicken: This is a non-negotiable step! Always allow cooked chicken to rest for 5 minutes before cutting to lock in juices and ensure tender, succulent meat.
- Maximize Marinade: To allow the buttermilk and hot sauce marinade to penetrate deeper for maximum flavor, you can lightly pierce the chicken cutlets a few times with a fork before adding them to the marinade.
- Warm Tortillas: Briefly warming your flour tortilla wraps in a microwave or a dry pan for 10-15 seconds before assembling makes them more pliable. This prevents cracking during rolling and makes for a more flexible, enjoyable wrap.
- Portable Lunches: For perfectly fresh packed lunches, wrap prepared grilled chicken wraps individually in foil or plastic wrap. Include a small ice pack in your lunch bag to keep them cool and delicious until lunchtime.
Common Mistakes to Avoid
- Bland Chicken: The most common mistake! Avoid not seasoning chicken enough by ensuring a thorough application of the spice rub and allowing adequate time for the unique buttermilk marinade to work its magic.
- Dry Chicken: This is easily preventable. Reiterate: prevent overcooking chicken by strictly adhering to the 165°F (75°C) internal temperature guideline. Dry chicken leads to a tough, less enjoyable wrap.
- Soggy Wraps: To prevent soggy wraps, always pat your iceberg lettuce leaves very dry after washing. Drain any liquid from other fillings like tomatoes or onions. If making wraps for later, it’s best to add the ranch dressing just before serving or even provide it on the side for dipping.
- Wraps Falling Apart: This usually comes down to two things: overfilling or improper rolling. Reinforce proper rolling a tight, secure wrap technique and avoid trying to pack too much into your flour tortilla wraps.
Serving & Storage
Here’s how I like to serve these delectable wraps and ensure they stay fresh for future meals:
Serving Suggestions
I always serve my grilled chicken wraps sliced in halves. This offers an appealing presentation and makes them much easier to handle and eat. For an interactive and customizable experience, provide ranch dressing (especially the homemade spicy ranch!) on the side for dipping, allowing everyone to customize their preferred amount of creaminess and kick.
These wraps are fantastic on their own, but if you’re looking for complementary side dishes, a simple green salad, fresh fruit, crispy air fryer green beans, or even light hummus veggie wraps make wonderful additions. For a heartier summer lunch, a classic side of chips or a creamy potato salad pairs perfectly.
Storage & Meal Prep
- Refrigeration: Wondering how long do grilled chicken wraps last in the fridge? When properly wrapped tightly in plastic wrap or foil, leftover wraps can be stored in the fridge for 3-4 days. For optimal freshness and to prevent soggy wraps, I often recommend storing the grilled chicken, dressing, and fresh components like lettuce separately if you’re prepping more than a day in advance.
- Freezing: Can grilled chicken wraps be frozen? While assembled wraps with fresh lettuce and dressing do not freeze well due to texture changes upon thawing, you can absolutely freeze the cooked, sliced chicken breasts. Store them in an airtight container or freezer bag for up to 3 months. Thaw in the fridge overnight before using.
- Reheating: For reheating leftover wraps, gently warm the chicken in a microwave or a pan until heated through. If you have an assembled wrap, a brief press on a grill pan or panini press can re-crisp the tortilla, but be careful not to overheat and wilt your fresh fillings.
- Meal Prep: This recipe is a dream for meal prep! Grill a larger batch of chicken at the start of the week, prepare your spicy ranch dressing, and chop any additional vegetables. Then, assembling fresh packed lunches or quick dinners throughout the week becomes a matter of minutes.
Conclusion
I genuinely believe these grilled chicken wraps will become a cherished recipe in your repertoire. Their ease, speed, and incredible flavor are truly unmatched, thanks to the magic of the quick 15-minute buttermilk and hot sauce marinade and that irresistible homemade spicy ranch dressing. By following my detailed steps and incorporating these pro tips, even beginners can achieve beautifully tender chicken and perfectly rolled, non-soggy wraps every time. Don’t hesitate to experiment with the customizable fillings and explore all the delicious serving ideas. I can’t wait for you to try them! Please share your culinary creations or leave a comment below – happy cooking!
FAQ
- Q1: What’s the best way to cook chicken for grilled chicken wraps?
- A: For the juiciest results, I recommend using a grill pan indoors or an outdoor grill for your chicken cutlets. Cook until the internal temperature of the center of the chicken must be at least 165°F (75°C), then allow the juicy chicken breasts to rest for 5 minutes before slicing.
- Q2: How do I prevent my grilled chicken wraps from getting soggy?
- A: The key is moisture control! Ensure your lettuce leaves are very dry, drain any liquid from other fillings, and always add your ranch dressing just before serving or offer it on the side for dipping. If making ahead, store components separately.
- Q3: Can I make grilled chicken wraps ahead of time for meal prep?
- A: Absolutely, these are fantastic for meal prep! Prepare the grilled chicken, dressing, and chopped veggies in advance. For the best texture, assemble the wraps fresh right before eating, which is ideal for quick packed lunches.
- Q4: What are some healthy variations or substitutions for grilled chicken wraps?
- A: You can make many healthy tweaks! Use whole wheat tortillas or skip them entirely for lettuce wraps. Load up on more fiber-rich vegetables like bell peppers, spinach, or cucumber, and opt for a lightened-up ranch dressing or a vinaigrette.
- Q5: How long can I store leftover grilled chicken wraps in the fridge?
- A: When properly wrapped tightly in plastic or foil, leftover wraps can be stored in the fridge for 3-4 days. For optimal freshness, consider storing the chicken and fresh ingredients separately until you’re ready to assemble.
- Q6: What’s the best technique for rolling a tight chicken wrap?
- A: Lay your ingredients centered, fold in the short sides of the tortilla first, then roll tightly from the bottom up, keeping everything snug. Avoid overfilling, which is a common culprit for wraps falling apart.
- Q7: Can I use different types of tortillas?
- A: Yes, certainly! While flour tortilla wraps are standard, whole wheat tortillas, corn tortillas, or even larger lavash bread can be excellent alternatives. Don’t forget gluten-free options too.
- Q8: Would providing Ranch on the side for dipping be advisable?
- A: Yes, this is an excellent expert_tip! Offering the ranch dressing on the side allows individuals to control the amount, customize their flavor, and significantly helps prevent soggy wraps, especially useful for meal prep.
- Q9: What tools are recommended for making grilled chicken wraps?
- A: A good grill pan or an outdoor grill is essential for the chicken. A reliable kitchen thermometer is crucial for food safety and perfect doneness, and a sharp knife makes slicing chicken and vegetables much easier.
Juicy Grilled Chicken Wraps: 15-Min Marinade & Spicy Ranch
Ingredients
Equipment
Method
- First, prepare your quick buttermilk and hot sauce marinade by whisking together buttermilk and a dash of your favorite hot sauce in a bowl. Add the sliced chicken cutlets, ensuring they are fully coated. While they marinate briefly (just 15 minutes is plenty!), season the chicken cutlets generously with the smoked paprika, chili powder, garlic granules, salt, and ground black pepper. The spices will adhere beautifully, forming an aromatic rub.
- Heat a tablespoon of olive oil in a pan, or a grill pan, or preheat your outdoor grill to medium-high heat. You want a surface hot enough to create a nice sizzle and those coveted grill marks when the chicken hits it.
- Carefully place the seasoned chicken cutlets on the hot grill or pan. Listen for that satisfying sizzle! Cook on both sides until the chicken is cooked through. To ensure both food safety and prevent dry chicken, always use a kitchen thermometer to confirm the internal temperature of the center of the chicken must be at least 165°F (75°C). This guarantees juicy chicken every time. Look for beautiful char and distinct grill marks.
- Once cooked, remove the chicken from the grill and allow it to rest on a plate for 5 minutes. This crucial step helps the juices redistribute throughout the meat, ensuring your boneless skinless chicken remains incredibly juicy and tender.
- After resting, cut the chicken up into strips or bite-sized chunks, perfect for filling your wraps. I like to slice mine thinly for even distribution.
- To assemble, lay out a flour tortilla wrap. Layer it with crisp iceberg lettuce leaves, followed by the juicy grilled chicken, a generous sprinkle of shredded cheese (cheddar or mozzarella are fantastic!), and a delicious drizzle of my homemade spicy ranch dressing (or your preferred ranch dressing). Aim for an even distribution across the center.
- Seal the tortilla by folding in the sides, then rolling it tightly from the bottom up. For an extra touch of warmth and a slightly crispy exterior, place the assembled wrap on the grill (or lightly oiled grill pan). Cook for a minute or two on both sides until golden and slightly toasted. Remove, then slice the wraps in halves and serve immediately for the best experience.
- Lay your flour tortilla wraps flat. Arrange your fillings (lettuce, chicken, cheese, dressing) in a neat line just below the center, leaving space at the top and sides. Avoid overfilling!
- Take the bottom edge of the tortilla and fold it tightly up over the filling, tucking it in snugly.
- Fold in both the left and right sides of the tortilla over the filling, pulling them tight against the center.
- Continue rolling the wrap tightly upwards from the bottom. Keep it snug as you roll to create a compact, secure bundle.
Notes
Printable Recipe Card
Want just the essential recipe details without scrolling through the article? Get our printable recipe card with just the ingredients and instructions.