Skip to content
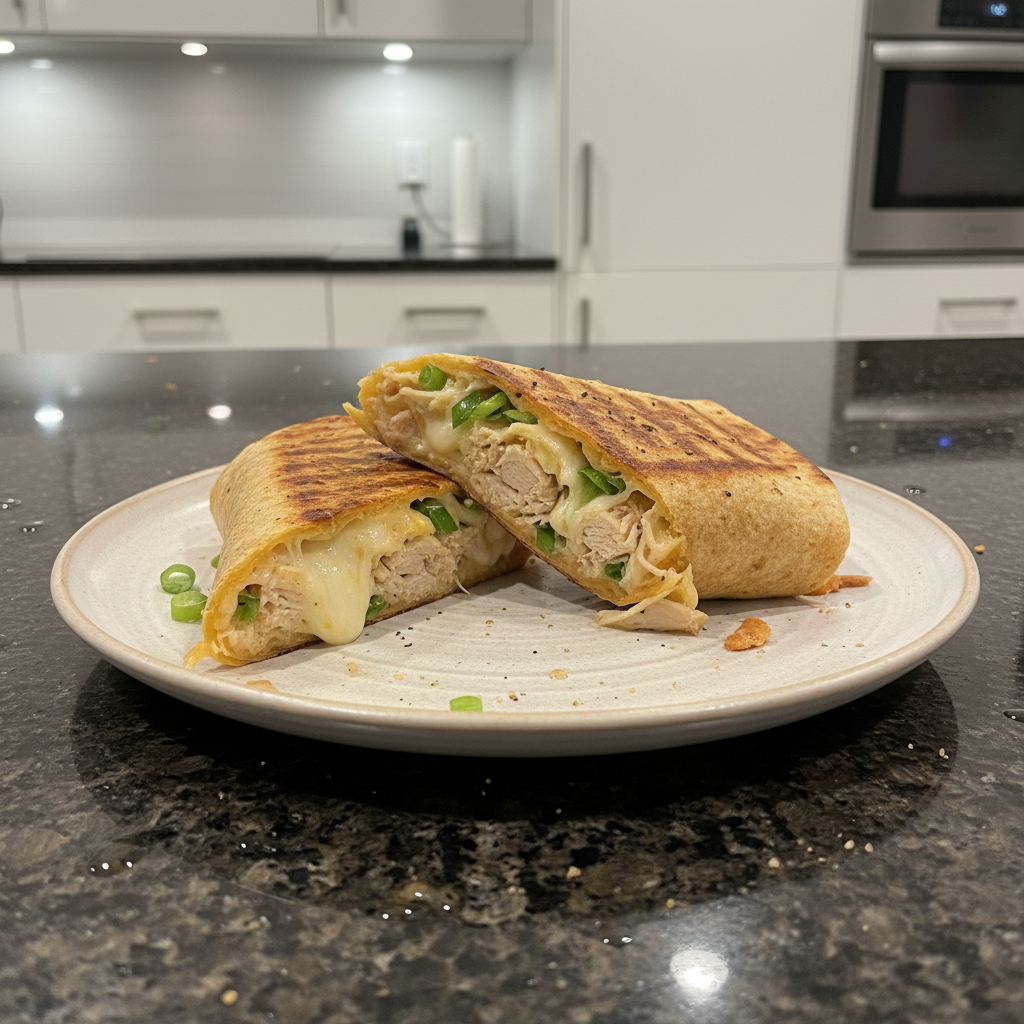
 There’s nothing quite like the craving for something crispy, gooey, garlicky, and utterly satisfying, isn’t there? In my kitchen, I’ve perfected a recipe that hits all those glorious notes and more: these incredible cheesy garlic chicken wraps. Whether you’re searching for a speedy weeknight dinner, a high-protein lunch option, or smart meal prep solutions, this recipe delivers. Get ready to discover your new obsession, featuring a unique garlic-infused butter twist that guarantees an unbeatable golden crunch and a burst of flavor in every bite!
Why You’ll Love This Recipe
The Secret to Unbeatable Crispy, Garlicky Wraps: Garlic-Infused Butter
The real magic in my cheesy garlic chicken wraps lies in a simple yet profound technique: brushing the outside of each tortilla with a thin layer of garlic-infused butter before cooking. I take softened unsalted butter and mix it with finely minced fresh garlic and a tiny pinch of parsley. This isn’t just for show; it’s a game-changer for both flavor and texture!
Here’s the delicious science behind it: the fat from the butter ensures an incredible Maillard reaction as the tortilla cooks. This means a more beautiful, golden-brown exterior that is irresistibly crispy. Beyond the crunch, the garlic in the butter caramelizes gently, creating a deeper, roasted garlic aroma that perfectly complements the fresh garlic in the filling. It amplifies the “garlic” in these wraps, making the flavor profile rich, complex, and utterly addictive.
More Than Just a Meal
These cheesy garlic chicken wraps are much more than a simple dish; they’re a culinary experience designed for modern life.
Quick & Easy: This is truly an easy recipe, perfect for a quick dinner or satisfying lunch recipe. Utilizing convenient ingredients like pre-cooked rotisserie chicken slashes your prep time dramatically.
High-Protein & Satisfying: Packed with chicken and cheese, these wraps are a fantastic high-protein meal that will keep you feeling full and happy. It’s the ultimate comfort food without the heavy fuss.
Meal Prep Friendly: The filling can be made ahead of time, making these wraps a dream for strategic meal prep. Assemble and cook fresh, or even freeze for later!
Irresistible Sensory Appeal: Imagine: crispy on the outside, gooey and garlicky inside. Every bite is a delightful combination of textures and vibrant flavors that will have you coming back for more.
Ingredients Needed

- 2 large tortillas (regular or low-carb/high-protein)
- 7 oz cooked chicken (about 200 grams, chopped (rotisserie is great))
- 2 garlic cloves (minced or grated (adjust to taste))
- 2 tablespoons light mayonnaise
- 1 tablespoon light Greek yogurt (or plain yogurt)
- 2 teaspoons hot sauce (like Frank’s)
- ¼ teaspoon salt
- 3 oz grated cheese (about 90 grams (I used a cheddar blend))
- 1 green onion (chopped)
- Olive oil spray
Ingredient Notes & Smart Swaps
Tortillas: For the best results, I recommend using large tortillas that are pliable but slightly thicker. These provide a good base for folding and achieve superior crispiness. You can use regular flour tortillas, or opt for low-carb tortillas or high-protein tortillas if that suits your dietary needs.
Chicken: My go-to for convenience is rotisserie chicken – it’s already cooked and seasoned! However, any cooked chicken works wonderfully. Feel free to use cooked chicken breast or chicken thigh, chopped or shredded. Just ensure it’s fully cooled before mixing into the filling.
Garlic: Fresh garlic cloves are essential for that vibrant flavor. Minced garlic offers a more subtle distribution, while grated garlic (using a microplane) releases more intense garlic oils for a bolder taste. Adjust the quantity to your personal preference!
Creamy Binders: A mix of light mayonnaise and light Greek yogurt (or plain yogurt) provides the perfect creamy texture and a touch of tang that brightens the entire filling. The yogurt also adds a nice protein boost.
Hot Sauce: I love the classic kick of Frank’s RedHot, but any hot sauce you enjoy will work. If you prefer a milder wrap, reduce the amount, or if you like it fiery, add a little extra! For a homemade alternative, you can blend roasted red peppers with a dash of vinegar and a pinch of cayenne.
Cheese: I used a versatile cheddar blend for its excellent melting properties and classic flavor. For extra stretch, try mozzarella. If you like a spicy kick, pepper jack is fantastic. Always opt for freshly grated cheese from a block; it melts much better than pre-shredded varieties.
Green Onion: Freshly chopped green onion adds a lovely mild oniony bite and a pop of color. If you don’t have green onions, a sprinkle of fresh chives or a tiny bit of finely chopped red onion can be used.
The Unique Twist Ingredient: Don’t forget the star of the show for that ultimate crisp! For the garlic-infused butter, you’ll need 1-2 tablespoons of softened unsalted butter, ½-1 clove of finely minced garlic, and a tiny pinch of fresh parsley (optional, but lovely for color and freshness).
Optional Add-ins: Get creative with your filling! Consider adding finely diced avocado, chopped sun-dried tomatoes, sliced olives, diced gherkins, fresh spinach, or sautéed mushrooms for extra flavor and texture.

How to Make Cheesy Garlic Chicken Wraps
Let’s get cooking! This step-by-step guide will walk you through crafting the most delicious, crispy, and gooey cheesy garlic chicken wraps.
1. Prepare the Creamy Garlic Chicken Filling
In a medium bowl, combine your chopped chicken, minced garlic, light mayonnaise, light Greek yogurt, hot sauce, and salt. Stir everything together thoroughly until all ingredients are well combined and the chicken is evenly coated in the creamy, garlicky mixture. Take a moment to appreciate that wonderful aroma!
2. Assemble the Wraps
Lay one of your large tortillas flat on a clean surface. On the lower third of the tortilla (the part closest to you), sprinkle about 2 tablespoons of your grated cheese. This cheese acts as a delicious glue and forms that crucial gooey layer. Top this with approximately ⅔ cup of the creamy chicken mixture, spreading it evenly over the cheese. Finish with another tablespoon of cheese and a generous sprinkle of chopped green onion.
3. Fold and Roll
To create a perfectly compact wrap, first fold in the sides of the tortilla over the filling. Then, starting from the bottom (the edge closest to you), roll the tortilla up tightly and evenly. A tight roll ensures your wrap holds its shape beautifully during cooking and prevents any delicious filling from escaping.
4. Apply the Garlic Butter Twist
Prepare your unique garlic-infused butter: In a small bowl, combine 1-2 tablespoons of softened butter with ½-1 clove of finely minced garlic and a tiny pinch of fresh parsley (if using). Lightly brush the exterior of each rolled wrap generously with this garlic butter mixture. This is the secret to maximum crispiness and an extra boost of roasted garlic flavor!
5. Heat the Pan
Place a good quality non-stick pan over medium-high heat. This is crucial for achieving that golden, crispy exterior. Once hot, lightly spray the pan with olive oil spray.
6. Cook to Golden Perfection (Pan-Frying Method)
Carefully place your garlic butter-brushed wraps, seam-side down, into the hot pan. Cook for 3–4 minutes per side, or until they are beautifully crispy and golden brown. I always recommend covering the pan with a lid during this step; the trapped steam helps to melt the cheese inside and warm the filling through faster, ensuring everything is gooey and delicious.
7. Serve
Once cooked to perfection, transfer the wraps to a cutting board. For easier eating and a beautiful presentation, slice each wrap in half diagonally. Serve immediately and enjoy your crispy, garlicky masterpiece!
Mastering the Crisp: Achieving Perfect Texture Every Time
Getting that irresistible crunch is key for the best cheesy garlic chicken wraps. Here’s how to ensure your wraps are always golden and crispy, never soggy.
Optimizing Pan-Frying
When pan-frying, maintain a consistent medium-high heat. This temperature is vital for the Maillard reaction, which gives food its delicious browned crust and complex flavors, without burning the tortilla. Always start by placing your wrap seam-side down; this helps seal the wrap as it cooks and maintains its structural integrity.
The lid is your best friend! Covering the pan helps create steam, which efficiently melts the cheese and warms the creamy chicken filling from the inside, while the direct heat crisps the exterior. This dual action gives you the best of both worlds: gooey interior, crunchy shell.
Air Fryer Method for Convenience
For an equally crispy, hands-off approach, the air fryer cooking method is fantastic. Preheat your air fryer to 375°F (190°C). Brush your rolled wraps with the garlic-infused butter, then place them in the air fryer basket in a single layer, ensuring they’re not overcrowded. Cook for 6–8 minutes, flipping halfway through, until they’re golden brown and the cheese is beautifully melted. Always check for your desired level of crispness!
Troubleshooting Soggy Wraps & Uneven Cooking
Preventing sogginess: The main culprits for soggy wraps are overfilling, a too-wet filling, or cooking on insufficient heat. Avoid overcrowding the pan or air fryer, as this lowers the temperature and steams the wraps instead of crisping them. Ensure your heat is consistent and high enough for that beautiful Maillard reaction.
For even cooking: A tight roll is crucial. If your wraps are loose, they might cook unevenly or burst. Make sure your heat source is consistent, and for safety, if you’re ever concerned about the chicken being warmed through, you can use a food thermometer to check the internal temperature, though with pre-cooked chicken, this is less of a concern than with raw meat.
Extending Your Meals: Make-Ahead, Freezing & Reheating
These cheesy garlic chicken wraps are incredibly versatile, making them ideal for efficient meal prep and enjoying throughout the week.
Make-Ahead Tips
The chicken filling is perfectly suited for advance preparation. You can mix the chopped chicken, garlic, mayonnaise, yogurt, hot sauce, and salt up to 3 days ahead of time. Store it in an airtight container in the refrigerator. This simple step streamlines your weeknight dinners, allowing you to assemble and cook the wraps in mere minutes.
Freezing Cheesy Garlic Chicken Wraps
Filling Only: If you’ve made a large batch of the chicken filling, it freezes beautifully! Store it in an airtight, freezer-safe container for up to 3 months. Thaw overnight in the refrigerator before using.
Assembled (Uncooked) Wraps: Yes, you can freeze assembled cheesy garlic chicken wraps! After rolling and before brushing with garlic butter, place the wraps on a baking sheet lined with parchment paper and flash freeze them for about 1-2 hours until solid. Once frozen, transfer them to a freezer-safe bag or container, separating layers with parchment paper, and store for up to 1 month. When ready to cook, you can cook them directly from frozen. Add a few extra minutes to your pan-frying or air fryer cooking time, or bake them at 400°F (200°C) for 20-25 minutes, flipping halfway, until golden and the filling is hot.
Storage of Cooked Wraps
Cooked cheesy garlic chicken wraps can be stored in an airtight container in the refrigerator for up to 2 days. While they won’t be as crispy as fresh, they’ll still be delicious!
Reheating Instructions for Optimal Crispness
To bring back that glorious crispness, avoid the microwave! I recommend reheating cooked wraps in a skillet over medium heat for 3-5 minutes per side, or in an air fryer at around 350°F (175°C) for 5-7 minutes. This will restore much of their original texture and ensure the filling is hot and gooey. For food safety, always ensure the internal temperature of reheated chicken wraps reaches 165°F (74°C).
Pro Tips & Troubleshooting
Pro Tips for Success
- Master the Garlic-Butter Twist: This is my signature secret! Don’t skip brushing the exterior of the wraps with the garlic-infused butter. A thin, even layer promotes unparalleled crispness and adds a rich, roasted garlic depth that makes these wraps truly special.
- Pre-Make the Filling: To save precious time on busy weeknights, prepare the chicken filling for your chicken wraps recipe up to 3 days in advance. It makes assembly a breeze!
- Cover for Gooey Cheese: When pan-frying, remember to place a lid on your pan. Covering the pan helps melt the cheese and warm the filling faster, ensuring a perfectly gooey interior.
- Fold Tightly: A snug roll keeps the filling securely inside and allows for even cooking and crisping. Practice makes perfect!
- Don’t Waste Leftovers: If you have any leftover chicken filling, it’s incredibly versatile! Use it in toasties, quesadillas, baked potatoes, or even mixed into a salad.
- Adjust to Your Taste: These wraps are wonderfully customizable. Feel free to adjust the number of garlic cloves, the amount of hot sauce (like Frank’s), or experiment with different types of cheddar blend cheese to suit your preferences.
Common Mistakes to Avoid
- Overfilling Your Wraps: Too much filling makes it difficult to roll the wraps tightly, which can lead to bursting during cooking or uneven crisping. Less is often more for structural integrity.
- Low Heat Cooking: Cooking on too low a heat is a common error that results in soggy, pale tortillas instead of the desired golden and crispy finish. Ensure your pan or air fryer is adequately hot.
- Forgetting the Lid (Pan-Frying): Without a lid, the internal filling may not heat through completely, and the cheese might not melt adequately, leaving you with a less-than-gooey center.
- Crowding the Pan/Air Fryer: Resist the urge to cook too many wraps at once. Overcrowding reduces the heat and creates steam, which prevents even crisping and heating. Cook in batches if necessary.
- Skipping the Garlic Butter: This unique twist is what elevates these wraps! Omitting the garlic-infused butter means missing out on the recipe’s signature crispness and enhanced, complex garlic flavor.
Serving & Storage
Delicious Serving Ideas
These cheesy garlic chicken wraps are a satisfying easy recipe on their own, but they truly shine when paired with complementary sides. For a light and fresh accompaniment, I love serving them with a big, crunchy salad – a simple green salad with a vinaigrette or a classic Caesar salad works beautifully. Crispy roasted vegetables like broccoli, asparagus, or sweet potato fries also make an excellent side. And of course, a handful of chips on the side is always a welcome crunch!
Don’t forget the dipping sauces and garnishes! A side of fresh salsa, extra hot sauce, tangy pickles or gherkins, or even a dollop of Greek yogurt mixed with fresh herbs can elevate the experience. Garnish with a sprinkle of fresh green onion or parsley for a pop of color and freshness. They make a perfect quick dinner or hearty lunch recipe.
Storage and Make-Ahead
Cooked Wraps: Any leftover cooked wraps should be stored in an airtight container in the refrigerator for up to 2 days. As detailed in Section 5, I highly recommend reheating them in a skillet or air fryer to restore their crispness.
Filling Only: The chicken filling is fantastic for meal prep! Prepare it 2-3 days in advance and keep it in an airtight container in the refrigerator. This saves a lot of time on your cooking day.
Freezing: Remember, you can also freeze assembled, uncooked wraps for a convenient grab-and-cook option. Refer to Section 5 for detailed freezing instructions to keep your freezer stocked with easy meals!
Conclusion
There you have it – the ultimate recipe for cheesy garlic chicken wraps that are guaranteed to become a household favorite. From their effortless preparation to that irresistible crispy exterior, thanks to our special garlic-butter twist, and the gooey, garlicky interior, these wraps truly define comfort food and a satisfying high-protein meal.
Don’t be shy; even if you’re new to the kitchen, this recipe is incredibly forgiving and yields maximum reward for minimal effort. I encourage you to try out different variations, experiment with your favorite add-ins like creamy avocado or savory sun-dried tomatoes, and explore various serving ideas. Your taste buds will thank you!
So go ahead, print out this recipe, share it with your friends and family, and get ready to enjoy one of the most delicious and easy meals you’ll ever make. For more inspiring easy recipe ideas, be sure to explore the rest of my culinary adventures!
FAQ
Common Questions About Cheesy Garlic Chicken Wraps
What kind of chicken is best for cheesy garlic chicken wraps?
I highly recommend using a pre-cooked rotisserie chicken for ultimate convenience and flavor. Alternatively, cooked and shredded chicken breast or chicken thigh work wonderfully, providing a lean protein base.
How do you get chicken wraps crispy?
The secret to crispy cheesy garlic chicken wraps is my unique garlic-infused butter twist! Brush the outside of your tortillas generously with softened butter mixed with minced garlic and a pinch of parsley before cooking. Then, cook them on medium-high heat in a non-stick pan (seam-side down first) or in an air fryer until golden and crisp. Choosing a slightly thicker, pliable tortilla also helps achieve superior crispiness.
Can I make the cheesy garlic chicken filling ahead of time?
Absolutely! The chicken filling can be prepared up to 3 days in advance. Store it in an airtight container in the refrigerator, and it’ll be ready to go when you are, making meal prep a breeze.
What are some variations for cheesy garlic chicken wraps?
Feel free to customize! You can use different cheese blends like pepper jack for heat or mozzarella for extra stretch. Incorporate finely chopped vegetables such as fresh spinach or sautéed mushrooms. Other popular additions include diced avocado, chopped sun-dried tomatoes, or sliced olives for extra flavor.
What are the best side dishes to serve with cheesy garlic chicken wraps?
For a complete and satisfying meal, pair these wraps with a crunchy salad (like a Caesar or simple green salad), some crispy roasted vegetables (broccoli, asparagus, or sweet potato), or a side of classic chips. Don’t forget dipping sauces like salsa or extra hot sauce!
Can I bake these cheesy garlic chicken wraps instead of pan-frying or air frying them?
Yes, you can! To bake, preheat your oven to 400°F (200°C). Brush the assembled wraps with the garlic-infused butter and place them on a baking sheet. Bake for 15-20 minutes, flipping halfway through, until they are golden brown and crispy, and the cheese is melted and gooey.
How long do I cook chicken wraps in an air fryer?
For perfect air-fried wraps, preheat your air fryer to 375°F (190°C). Cook the garlic butter-brushed wraps for 6-8 minutes, flipping them halfway, until they are golden, crispy, and heated through.
Can cheesy garlic chicken wraps be frozen?
The chicken filling can be frozen separately for up to 3 months. For assembled (uncooked) wraps, flash freeze them on a baking sheet until solid, then transfer to a freezer-safe bag or container. They can be cooked from frozen; simply add a few extra minutes to the cooking time in a pan, air fryer, or oven, ensuring the internal temperature reaches 165°F (74°C) for food safety.
Easy Crispy Cheesy Garlic Chicken Wraps: Your New Favorite!
Ingredients
Equipment
Method
- In a medium bowl, combine your chopped chicken, minced garlic, light mayonnaise, light Greek yogurt, hot sauce, and salt. Stir everything together thoroughly until all ingredients are well combined and the chicken is evenly coated in the creamy, garlicky mixture.
- Lay one of your large tortillas flat on a clean surface. On the lower third of the tortilla (the part closest to you), sprinkle about 2 tablespoons of your grated cheese. Top this with approximately ⅔ cup of the creamy chicken mixture, spreading it evenly over the cheese. Finish with another tablespoon of cheese and a generous sprinkle of chopped green onion.
- To create a perfectly compact wrap, first fold in the sides of the tortilla over the filling. Then, starting from the bottom (the edge closest to you), roll the tortilla up tightly and evenly.
- In a small bowl, combine 1-2 tablespoons of softened butter with ½-1 clove of finely minced garlic and a tiny pinch of fresh parsley (if using). Lightly brush the exterior of each rolled wrap generously with this garlic butter mixture.
- Place a good quality non-stick pan over medium-high heat. Once hot, lightly spray the pan with olive oil spray.
- Carefully place your garlic butter-brushed wraps, seam-side down, into the hot pan. Cook for 3–4 minutes per side, or until they are beautifully crispy and golden brown. Cover the pan with a lid during this step.
- Once cooked, transfer the wraps to a cutting board. Slice each wrap in half diagonally. Serve immediately.
Notes
Printable Recipe Card
Want just the essential recipe details without scrolling through the article? Get our printable recipe card with just the ingredients and instructions.