Skip to content
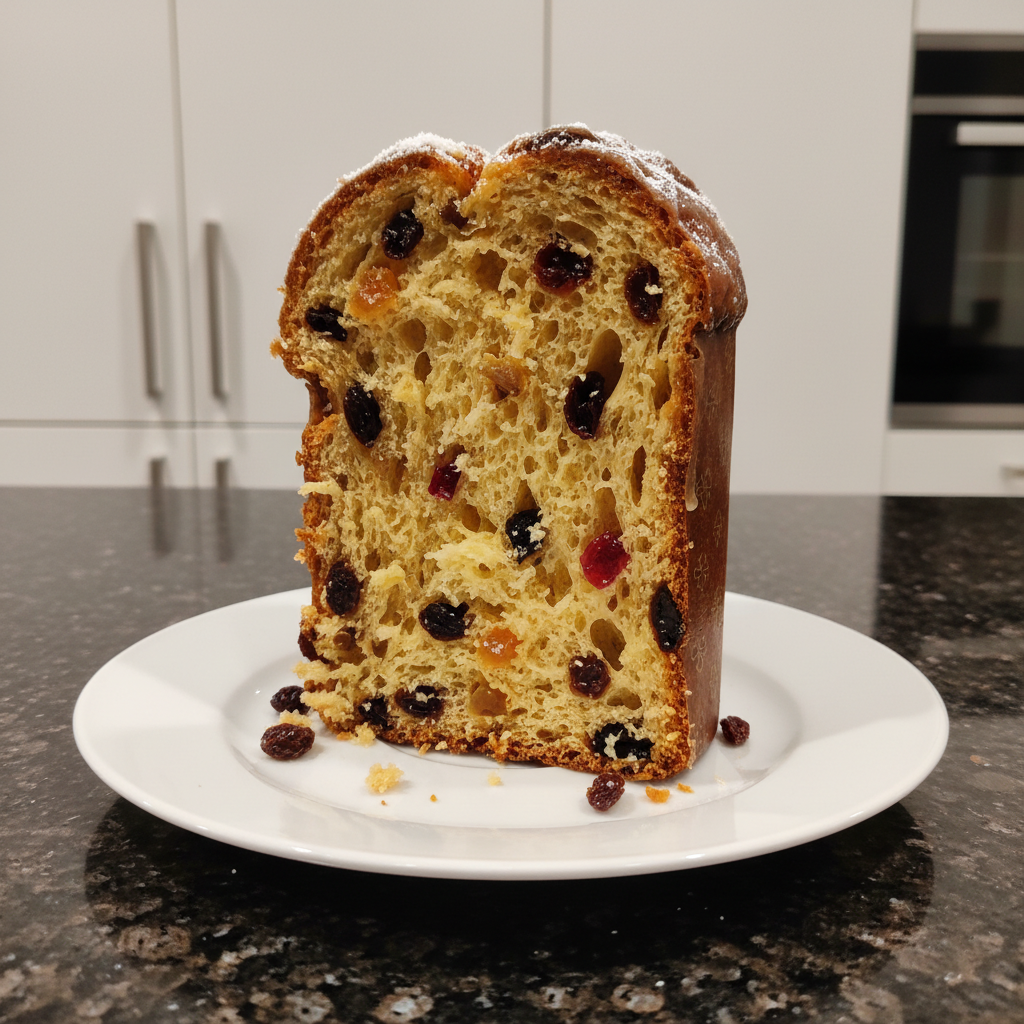
 As the holiday season draws near, my kitchen fills with the comforting aroma of baking, and nothing signals the start of festivities quite like a homemade Panettone. This iconic Italian Christmas bread, with its fluffy texture and sweet, citrusy notes, is an absolute dream. I know many home bakers have faced the challenge of sinking fruit or a dry crumb, but I promise, with this definitive christmas panettone recipe, those worries will be a thing of the past. Prepare to bake a traditional, incredibly moist, and flavorful Panettone that will be the star of your holiday table.
Why You’ll Love This Recipe
Every baker dreams of that perfectly domed, fruit-studded Panettone, and I’m thrilled to share my secret for achieving just that. My unique twist on this classic ensures an unbelievably moist crumb and perfectly distributed fruit every single time.
The Secret to Perfect Fruit: The magic lies in how we treat the dried fruits. Instead of just adding them dry or briefly soaking, we’ll gently macerate the raisins, dried cranberries, and dried currants in warm orange liqueur and fresh orange zest for a delightful 30 minutes. After this aromatic bath, we drain them and lightly toss them with just 1 tablespoon of bread flour. This simple step deeply infuses the fruits with moisture and bright flavor, preventing them from drying out during baking. Crucially, the light flour coating creates a subtle barrier, helping the fruits adhere beautifully to the dough and preventing them from sinking to the bottom, a common pitfall with `enriched ingredients` like these.
Achieve Bakery-Quality Results: You’ll be delighted with a sweet, soft, buttery, tender bread boasting vibrant fruit and citrus notes that rival any professional Milanese pastry. This isn’t just baking; it’s crafting a masterpiece.
Reliable & Foolproof: This recipe minimizes common baking frustrations. Say goodbye to dry, hard fruits or a dense crumb. My method guarantees plump, flavorful, and evenly distributed fruit, making your baking experience truly rewarding.
Impressive Holiday Centerpiece: Imagine presenting this show-stopping homemade Italian Christmas bread at your next gathering. It’s perfect for festive celebrations, a cherished gift, or simply enjoying with your loved ones, embodying the true spirit of the holidays.
Ingredients Needed

Gathering your ingredients with care is the first step to a truly magical Panettone. Here’s exactly what you’ll need:
- For the Sponge (Pre-ferment):
- 8 ounces water (70ºF)
- 15 grams instant yeast
- 10 ounces bread flour
- For the Main Dough:
- 8 ounces butter (room temperature) softened
- 4 ounces honey
- 1 teaspoon salt
- 2 eggs (room temperature)
- 2 egg yolks (room temperature)
- 1 teaspoon vanilla
- 12 ounces bread flour
- For the Fruit Mixture:
- 3 ounces raisins
- 2 ounce candied orange peel
- 3 ounces dried cranberries
- 2 ounces dried currants
- 1 tablespoon lemon zest
Ingredient Notes & Substitutions
Let’s dive into some specifics to ensure your Panettone is nothing short of perfect!
Bread Flour: This recipe calls for bread flour because its higher protein content is essential for developing strong gluten development. This robust gluten network is crucial for supporting the `enriched ingredients` like butter and eggs, preventing a dense crumb and ensuring that classic light, airy Panettone texture.
Yeast: We use instant yeast here for its convenience and consistent rise—no proofing required! While using a `sourdough starter` is certainly possible for Panettone, it would require significant recipe adjustments, longer fermentation times, and a different approach to achieve the desired result.
Butter & Eggs: Always use room temperature butter and eggs. This ensures proper emulsion, leading to a smooth, cohesive dough that incorporates evenly and rises beautifully.
Honey: Beyond sweetness, honey contributes to the Panettone’s wonderful flavor profile and helps keep the bread incredibly moist.
Dried Fruits: Our traditional mix includes raisins, candied orange peel, dried cranberries, and dried currants. Feel free to experiment with other variations like chocolate chips, pistachios, or dried cherries. Just be sure to apply our unique maceration and flour-dusting twist to any fruits you choose! For the macerating liquid, a sweet liqueur like rum or orange liqueur works wonderfully.
Citrus Zest: The lemon zest (or orange zest if you prefer) is more than just a garnish; it provides a `bright sweet surprise` and a beautiful aroma that truly defines a classic Panettone. If you enjoy those tangy flavors, you might also like to try our ultimate lemon cake recipe.

How to Make Your Christmas Panettone
Making Panettone is a labor of love, but every step is rewarding. Follow these instructions closely for a flawless loaf!
Prepare the Sponge
- First, in a medium bowl, combine the 15 grams of instant yeast with 10 ounces of bread flour. Then, add this mixture to 8 ounces of water (at 70ºF) and mix until it’s completely smooth and no dry streaks of flour remain.
- Cover the bowl tightly with plastic wrap and place it in the fridge. Allow it to ferment until it has doubled in size, or preferably, leave it overnight. The `sponge (pre-ferment)` should look very bubbly, slightly domed, and might show a slight collapse in the center, indicating peak activity.
Mix the Main Dough
- In a separate large bowl, combine the remaining 12 ounces of bread flour with 1 teaspoon of salt. Set this aside.
- In the bowl of your stand mixer fitted with the paddle attachment, cream together the softened 8 ounces of butter and 4 ounces of honey until light and fluffy.
- Slowly add the 2 eggs, 2 egg yolks, and 1 teaspoon of vanilla to the butter and honey mixture. Mix until they are almost combined; don’t worry if the eggs and butter don’t fully `emulsion` at this stage, it will come together later.
- Add the prepared `sponge (pre-ferment)` to the egg and butter mix. The dough will initially look somewhat broken or separated. Continue to mix until it becomes uniform in texture, then gradually add the flour mixture from step 3. Mix for about 3 minutes until all the ingredients come together to form a shaggy dough.
- Switch from the paddle attachment to the dough hook.
Macerate Fruits & Incorporate into Dough
- This is the key step for no-sink fruit! In a small bowl, combine the 3 ounces of raisins, 3 ounces of dried cranberries, and 2 ounces of dried currants with a splash of warm orange liqueur (or a sweet liqueur like rum) and the 1 tablespoon of lemon zest (or orange zest if you prefer). Let them macerate for 30 minutes to plump up and absorb the wonderful flavors.
- After macerating, drain any excess liquid from the fruits. Then, lightly toss the macerated fruits and the 2 ounces of candied orange peel with 1 tablespoon of bread flour. This light coating will help them adhere to the dough and prevent sinking.
- Add the floured fruits and lemon zest into the dough in the stand mixer. Mix with the dough hook on low speed for 8 minutes to ensure even distribution and to develop the crucial gluten development. The dough should feel slightly warm to the touch, ideally around 75-80°F (24-27°C), which is `ideal dough temperature for optimal fermentation`.
First Rise (Bulk Fermentation)
- Cover the mixing bowl tightly with plastic wrap and let the dough rise for 30 minutes at room temperature. If you need more time for `fermentation` or want to develop more flavor, you can place the dough in the fridge to ferment slower using a `cold rise method`. For optimal room temperature rising, place the covered bowl in a warm spot, like a turned-off oven with the light on, or a dedicated `proofing box`.
Shaping & Second Proof
- If you’re using mini panettone wrappers, portion your dough into approximately 3-ounce balls and carefully place them into the papers. This recipe should yield around 25 mini Panettone. You can also use larger panettone wrappers or traditional loaf pans for a larger cake.
- Cover the shaped doughs lightly with plastic wrap and let them `proofing (first rise)` in the papers for about 30 minutes at room temperature. If your dough was cold from fermenting in the fridge, this `fermentation` could take longer. The dough should feel airy and slightly jiggly.
Baking Your Panettone
- Preheat your oven to 375°F (190°C).
- Prepare an egg wash by mixing an egg and an egg yolk with a pinch of salt. Gently brush the tops of the proofed doughs with this `egg wash` for a beautiful `golden crust`.
- Arrange the Panettone on a sheet pan, ensuring they are evenly spaced. Place the sheet pan into the preheated oven for approximately 25 minutes. Baking time will vary depending on the size of the Panettone you are baking.
- The bread is done when it is nicely browned on top and has an internal temperature of about 200°F (93°C) when a probe thermometer is inserted into the middle.
- Once baked, let the breads cool completely. However, they are absolutely divine enjoyed warm, perhaps with a dollop of mascarpone cheese!
Mastering Your Panettone Dough: Equipment & Technique
Achieving a truly professional-grade Panettone involves understanding not just the steps, but the science and the tools. Here’s how to master your dough.
Stand Mixer Essentials
For an `enriched` dough like Panettone, a robust stand mixer is your best friend. A powerful model (KitchenAid Artisan or Professional series, for example) is crucial for handling the dense, buttery dough. Begin with the paddle attachment to `cream butter and honey` and ensure a smooth `emulsion` when incorporating the eggs and other wet ingredients. Once the dough starts to come together, switch to the dough hook. This attachment is indispensable for effective `gluten development` through kneading and for thoroughly mixing in the fruits without tearing the delicate structure. Always use a kitchen scale for precise measurements of ingredients, especially flour and yeast, as even slight variations can impact the final texture.
Achieving Perfect Gluten Development & the Windowpane Test
The secret to Panettone’s signature light, airy, and `fluffy` texture lies in exceptional gluten development. Kneading, particularly for 8 minutes with the dough hook, is vital. This process strengthens the gluten strands, creating an elastic network that can trap the gases produced by the yeast, allowing the bread to rise high and maintain its structure. To check for optimal gluten development, perform the windowpane test: take a small piece of dough (about a golf ball size) and gently stretch it between your fingers. If you can stretch it thin enough to see light pass through without it tearing, creating a “windowpane,” then your gluten is perfectly developed. This test is critical for Panettone dough to achieve that `soft`, `fluffy`, and `tender` crumb capable of supporting the fruits and rising beautifully without collapsing.
Optimal Dough Temperature & Fermentation
For optimal yeast activity and `fermentation`, maintaining the `ideal dough temperature` is key. After mixing and kneading, your dough should feel slightly warm to the touch, generally in the range of 75-80°F (24-27°C). To achieve this, ensure all your ingredients are at room temperature. If your kitchen is cool, you can warm your mixing bowl slightly before starting. For `optimal conditions for room temperature dough rising`, cover your bowl securely with plastic wrap to prevent a skin from forming, and place it in a consistently warm, draft-free spot. A turned-off oven with the light on, or a dedicated `proofing box`, are excellent environments. For an even deeper flavor profile, consider a `cold rise method` by placing the dough in the refrigerator overnight; this slows down `fermentation` and develops more complex flavors.
Pro Tips & Troubleshooting
Even seasoned bakers encounter challenges. Here are my top tips and solutions to common issues to ensure your christmas panettone recipe turns out perfectly every time.
Pro Tips for Panettone Perfection
- Room Temperature Ingredients: I cannot stress this enough – room temperature eggs and butter are crucial for proper emulsion and cohesive dough. This ensures everything combines smoothly and the dough rises evenly.
- Sponge Prep: If you’ve chilled your `sponge (pre-ferment)`, remember to take the sponge out of the fridge 30 minutes before use to prevent it from being too cold and shocking the rest of your dough.
- Doneness is Key: Always check for doneness with a probe thermometer. Your Panettone should reach an internal temperature of around 200°F (93°C). This guarantees a fully baked, moist crumb without any guesswork.
- Cooling Large Panettone: For larger loaves, cooling large panettone loaves upside down using skewers to prevent collapse is essential. This unique method allows the delicate structure to set without compressing under its own weight, preserving that beautiful, airy texture.
- Precision with a Kitchen Scale: For consistent, perfect results, always use a kitchen scale for measuring ingredients, especially flour and yeast. Baking is a science!
- No-Sink Fruit Assurance: Our unique maceration and flour-dusting twist is your ultimate assurance. By deeply infusing the fruits and giving them a slight coating, you guarantee plump, flavorful fruit that doesn’t sink, but rather suspends beautifully throughout the loaf.
Common Mistakes to Avoid
- Wrong Yeast Type: Avoid using dry active yeast instead of instant yeast without adjusting activation steps. Dry active yeast `may require longer rise times` and different proofing, which can throw off the recipe’s balance.
- Over-Soaking Raisins: While our twist involves maceration, be mindful not to soak raisins for too long in plain water. This `can cause them to shred apart during mixing` and dilute their flavor, which is why our method uses specific liqueur and flour coating.
- Under-Kneading: If your bread comes out dense, it might be due to under-kneading. Under-kneaded bread will not develop sufficient gluten structure to trap CO2 gases, preventing proper rise and leading to a `dense crumb`. Don’t shorten that 8-minute kneading time!
- Cold Environment: A common culprit for slow or no rise is a chilly kitchen. Remember that cold environments stunt yeast activity, significantly prolonging dough rise times and can lead to `dough not rising` properly. Find a warm spot!
- Over-Baking: Nobody wants a `dry panettone`. Over-baking is a sure way to achieve this. Always rely on your probe thermometer to hit that 200°F (93°C) internal temperature, and then take it out promptly.
Serving & Storage
Your homemade Panettone is a treat to savor, whether it’s fresh from the oven or enjoyed days later. Here’s how to make the most of it.
Serving Ideas
Panettone is truly versatile! It’s traditionally served with mascarpone cheese and a sweet liqueur in Italy, which creates a rich, indulgent experience. For everyday enjoyment, I love it warm or toasted with butter and a cup of hot coffee, or simply warm with some butter and jam. It makes an incredible addition to any brunch spread, perhaps with fresh berries and a dollop of whipped cream, or transformed into French toast. Above all, it’s a quintessential holiday treat that brings warmth and cheer to any Christmas or Holidays gathering.
Storage and Make-Ahead
To maintain its `soft`, `buttery`, `tender` quality, store your Panettone tightly wrapped in plastic wrap or in an airtight container at room temperature. It will stay fresh and delicious for several days. For longer preservation, you can `freeze` the Panettone. Once completely cooled, wrap it securely in plastic wrap and then in foil, then place it in a freezer-safe bag. It will keep well for up to 3 months. To `reheat and refresh stored panettone`, thaw it at room temperature overnight, then warm gently in a low oven (around 300°F/150°C) for 10-15 minutes until fragrant and soft.
Gifting Homemade Panettone
A homemade Panettone makes a truly heartfelt gift during the holidays. To present it beautifully, consider using decorative panettone wrappers, tying them with festive ribbons, or placing them in elegant decorative boxes. For optimal freshness when gifting, ensure the Panettone is completely cool before wrapping. Advise your recipient to store it tightly wrapped at room temperature and enjoy it within a few days, or `freeze` it for later enjoyment. A small tag with a serving suggestion or a warm holiday message adds a personal touch.
Conclusion
Baking a homemade Panettone is more than just following a recipe; it’s an experience that fills your home with the intoxicating aromas of the season and culminates in a truly spectacular, `sweet`, `buttery` treat. This christmas panettone recipe is designed to guide you to success, producing a loaf with a beautifully `soft`, `fluffy`, `tender` crumb that delights every palate.
Our unique fruit maceration twist, by infusing and lightly dusting the fruits, guarantees that every slice will have plump, flavorful fruit perfectly suspended throughout, completely eliminating the dreaded sinking issue. While Panettone can seem daunting, with these clear instructions, detailed techniques, and expert pro tips, it is absolutely achievable for home bakers of all levels.
I genuinely hope this guide inspires you to bake a masterpiece this Christmas. Feel free to experiment with `variations` like adding chocolate chips or pistachios, and don’t forget to share your festive creations! Happy baking!
FAQ
Is panettone a bread or a cake?
Panettone is technically a rich, sweet bread, similar to a brioche, rather than a cake. Its distinctive texture comes from extensive `gluten development` and yeast `fermentation`, a hallmark of bread-making. It originated as a Milanese pastry.
How is panettone traditionally eaten?
Panettone is traditionally served with mascarpone cheese and a sweet liqueur in Italy. It’s also delicious enjoyed warm with some butter and a cup of coffee, or simply on its own as a festive treat.
How do I store leftover panettone?
To keep Panettone fresh, store it tightly wrapped in plastic wrap or an airtight container at room temperature for several days. For longer storage, you can `freeze` it, well-wrapped, for up to 3 months. To `reheat`, simply thaw at room temperature and warm gently in a low oven.
Can I use sourdough starter instead of yeast?
While it is possible to make Panettone with a `sourdough starter`, this recipe is specifically formulated for instant yeast. Using `sourdough starter` would require significant adjustments to the recipe’s ingredients, timings, and feeding schedule, as well as a much longer `fermentation` process.
What is the ‘windowpane test’ and why is it important for panettone dough?
The windowpane test is a method used to check for adequate gluten development in dough. For Panettone, strong `gluten` structure is crucial because it allows the `sweet bread` to rise high and trap CO2 gases, maintaining a `soft`, `fluffy`, `tender` texture. Without proper gluten development, the dough would be unable to support its `enriched ingredients` and fruits, resulting in a dense crumb and potential collapse.
What is the ideal dough temperature for panettone after mixing?
The `ideal dough temperature` after mixing and kneading for Panettone is generally around 75-80°F (24-27°C). This temperature range ensures optimal yeast activity and `fermentation`, leading to the best possible rise and texture.
Why is panettone enjoyed around Christmas?
Panettone is primarily enjoyed around Christmas and the `Holidays` as a cherished tradition. Originating from `Milanese pastry` history, it symbolizes celebration, warmth, and generosity, making it a beloved festive treat shared among families and friends.
How do you prevent fruits from sinking in panettone?
To prevent fruits from sinking in Panettone, my unique twist involves macerating the fruits in warm liqueur and fresh zest, then draining them and tossing them lightly with 1 tablespoon of bread flour before adding to the dough. This creates a subtle barrier around the fruits and enhances their adhesion to the dough, ensuring plump, flavorful fruit that doesn’t sink and remains evenly distributed.
Best Christmas Panettone Recipe: No Sinking Fruit!
Ingredients
Equipment
Method
- In a medium bowl, combine the 15 grams of instant yeast with 10 ounces of bread flour. Add this mixture to 8 ounces of water (at 70ºF) and mix until completely smooth with no dry streaks of flour.
- Cover the bowl tightly with plastic wrap and place it in the fridge. Allow it to ferment until it has doubled in size, or preferably, leave it overnight. The sponge should look very bubbly, slightly domed, and might show a slight collapse in the center, indicating peak activity.
- In a separate large bowl, combine the remaining 12 ounces of bread flour with 1 teaspoon of salt. Set this aside.
- In the bowl of your stand mixer fitted with the paddle attachment, cream together the softened 8 ounces of butter and 4 ounces of honey until light and fluffy.
- Slowly add the 2 eggs, 2 egg yolks, and 1 teaspoon of vanilla to the butter and honey mixture. Mix until almost combined; don't worry if the eggs and butter don't fully emulsify at this stage.
- Add the prepared sponge to the egg and butter mix. The dough will initially look somewhat broken or separated. Continue to mix until it becomes uniform in texture, then gradually add the flour mixture from step 3. Mix for about 3 minutes until all ingredients form a shaggy dough.
- Switch from the paddle attachment to the dough hook.
- In a small bowl, combine the 3 ounces of raisins, 3 ounces of dried cranberries, and 2 ounces of dried currants with a splash of warm orange liqueur (or a sweet liqueur like rum) and the 1 tablespoon of lemon zest. Let them macerate for 30 minutes to plump up and absorb the wonderful flavors.
- After macerating, drain any excess liquid from the fruits. Then, lightly toss the macerated fruits and the 2 ounces of candied orange peel with 1 tablespoon of bread flour. This light coating will help them adhere to the dough and prevent sinking.
- Add the floured fruits and lemon zest into the dough in the stand mixer. Mix with the dough hook on low speed for 8 minutes to ensure even distribution and to develop crucial gluten. The dough should feel slightly warm, ideally around 75-80°F (24-27°C).
- Cover the mixing bowl tightly with plastic wrap and let the dough rise for 30 minutes at room temperature. For more flavor, you can place the dough in the fridge for a slower cold rise. For optimal room temperature rising, place the covered bowl in a warm spot, like a turned-off oven with the light on, or a dedicated proofing box.
- If using mini panettone wrappers, portion your dough into approximately 3-ounce balls and carefully place them into the papers. This recipe yields around 25 mini Panettone. You can also use larger panettone wrappers or traditional loaf pans for a larger cake.
- Cover the shaped doughs lightly with plastic wrap and let them proof in the papers for about 30 minutes at room temperature. If your dough was cold from the fridge, this fermentation could take longer. The dough should feel airy and slightly jiggly.
- Preheat your oven to 375°F (190°C).
- Prepare an egg wash by mixing an egg and an egg yolk with a pinch of salt. Gently brush the tops of the proofed doughs with this egg wash for a beautiful golden crust.
- Arrange the Panettone on a sheet pan, ensuring they are evenly spaced. Place the sheet pan into the preheated oven for approximately 25 minutes. Baking time will vary depending on the size.
- The bread is done when it is nicely browned on top and has an internal temperature of about 200°F (93°C) when a probe thermometer is inserted into the middle.
- Once baked, let the breads cool completely. However, they are absolutely divine enjoyed warm, perhaps with a dollop of mascarpone cheese!
Notes
Printable Recipe Card
Want just the essential recipe details without scrolling through the article? Get our printable recipe card with just the ingredients and instructions.