Skip to content
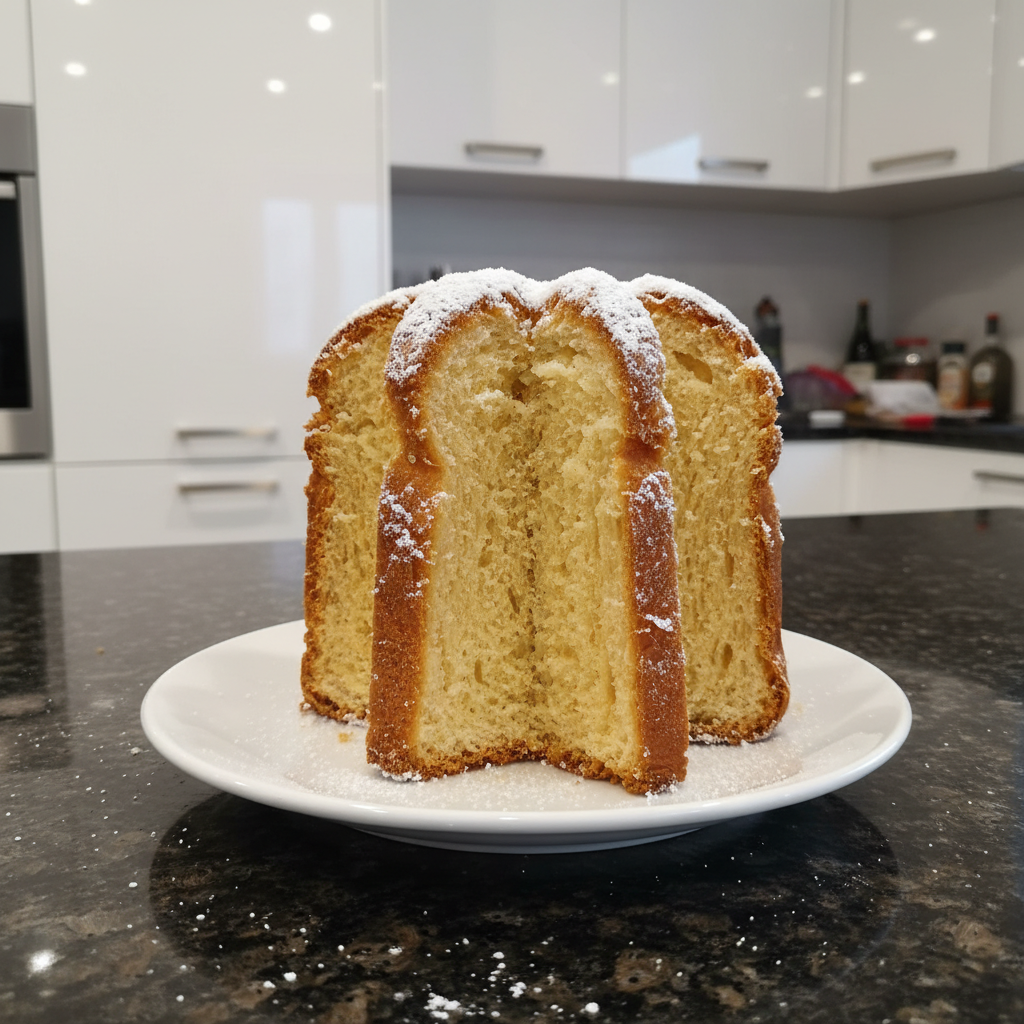
 Welcome to the magic of homemade Christmas Pandoro! This traditional Italian sweet bread, originating from Verona, is a festive staple known for its iconic star shape, delicate vanilla aroma, and incredibly light, buttery texture. For more on its origins, you can explore the history of Pandoro di Verona. As a chef and food columnist, I’ve always cherished the ritual of holiday baking, and this authentic christmas pandoro recipe is one I’m particularly proud to share. Forget store-bought – our detailed guide will help you bake a show-stopping Pandoro that will become the star of your holiday table, impressing family and friends with every golden, fluffy slice.
Why You’ll Love This Recipe
In my kitchen, I’m always looking for ways to elevate traditional recipes, and this Pandoro is no exception. The secret, my friends, is an Overnight Cold Fermentation, a unique twist that truly sets this recipe apart.
Unmatched Flavor & Texture: This slow, cold proof isn’t just a step; it’s a game-changer. It leads to a significantly richer, more complex flavor profile and an incredibly tender, airy crumb. Scientifically, the extended cold fermentation allows yeast enzymes more time to break down complex carbohydrates, improving gluten structure and deepening flavor development, resulting in a melt-in-your-mouth quality far superior to any store-bought Pandoro. You can learn more about the digestive benefits of cold fermentation in bread making.
Impressive Holiday Centerpiece: Imagine presenting this towering, golden, star-shaped beauty at your Christmas gathering. It’s not just a dessert; it’s an experience, a conversation starter, and a testament to your holiday baking prowess.
Rewarding Baking Project: While Pandoro has a reputation for being challenging, this recipe makes it achievable and incredibly rewarding. It’s a joyous holiday tradition, allowing you to create something truly special and delicious from scratch.
Easier Dough Handling: Despite its rich nature, the cold fermentation process actually makes the butter dough less sticky and much easier to work with, making the entire baking process more enjoyable.
Ingredients Needed

To embark on this delightful christmas pandoro recipe, gather these quality ingredients. The precision here is key to a perfect outcome.
- 250g ’00’ flour (or unbleached all-purpose flour)
- 150g granulated sugar
- 150g unsalted butter, softened
- 3 large eggs, room temperature
- 10g fresh yeast (or 5g active dry yeast)
- 50ml warm milk
- 1/2 tsp fine sea salt
- 1 vanilla bean, scraped (or 1 tsp vanilla extract)
- Zest of 1 organic lemon
Ingredient Notes & Substitutions
Choosing the right ingredients and preparing them properly is the first step to success with any sweet leavened bread, especially Pandoro.
* ’00’ Flour: While traditional, finely milled ’00’ flour creates an incredibly tender crumb, unbleached all-purpose flour works beautifully as a widely available alternative in the US. It’s a forgiving substitute that still yields fantastic results.
* Yeast: I highly recommend using fresh yeast for this recipe as it lends a subtle, nuanced flavor. If using active dry yeast, remember the conversion: 5g of active dry yeast for 10g of fresh. Always ensure your yeast is fresh and active – using old yeast is a common mistake that can lead to a sad, flat Pandoro.
* Butter & Eggs: For that signature rich butter dough and proper emulsification, always use high-quality unsalted butter. Crucially, ensure all dairy and eggs are at room temperature. This allows them to integrate smoothly into the dough, creating a more cohesive and elastic structure.
* Vanilla: A scraped vanilla bean provides an unparalleled aromatic depth that truly elevates this Italian Christmas bread. If a vanilla bean isn’t accessible, a good quality vanilla extract can be used, but the bean’s fragrance is simply divine.
* Lemon Zest: The zest of an organic lemon adds a bright, subtle counterpoint to the richness, enhancing the overall flavor without adding any unwanted liquid.

How to Make Christmas Pandoro
Making Pandoro is a journey of patience and love, but every step is immensely rewarding. Follow these instructions carefully, and you’ll achieve a magnificent result.
Phase 1: Activating the Yeast & First Dough
- In a small bowl, combine the warm milk (ensure it’s lukewarm, about 105-115°F or 40-46°C, to not kill the yeast) with the fresh or active dry yeast and a pinch of granulated sugar. Let this mixture bloom for 10 minutes until it’s foamy and fragrant, indicating the yeast is active.
- In the bowl of a stand mixer fitted with the dough hook, combine 100g of the ’00’ flour with 50g of sugar and the activated yeast mixture. Mix on low speed until just combined. This forms a soft, sticky starter dough.
- Cover the bowl with plastic wrap and let it rise in a warm place for 1.5-2 hours, or until it has visibly doubled in size and looks bubbly. Don’t rush the rising stages; patience is key to developing flavor and texture.
Phase 2: Developing the Main Dough
- To the risen starter dough, add the remaining 150g ’00’ flour, 50g sugar, 2 of the room temperature eggs, and the salt. Knead on medium speed for 10-15 minutes until the dough comes together and is smooth and elastic. Under-kneading is a common mistake, preventing full gluten development vital for a light texture.
- Gradually add the softened unsalted butter, one tablespoon at a time, allowing each addition to be fully incorporated before adding the next. This process can take another 10-15 minutes. The dough will look glossy and sticky but should pull away from the sides of the bowl.
- Scrape in the vanilla bean seeds (or add vanilla extract) and the lemon zest. Knead for a final 2-3 minutes until everything is evenly distributed. You should have a very soft, elastic, and rich butter dough.
Phase 3: The Overnight Cold Fermentation (The Twist!)
- Lightly oil a large bowl. Transfer the Pandoro dough into it, turning once to coat. Cover tightly with plastic wrap.
- Place the covered bowl in the refrigerator for 8-12 hours, or preferably overnight. This overnight cold fermentation is our unique twist! This slow, cold proof significantly develops the complex flavors and creates that incredibly tender, airy crumb. It also makes the rich dough much easier to handle later.
Phase 4: Final Proof and Baking
- The next day, remove the dough from the refrigerator. Punch it down gently and shape it into a smooth ball. Ensure your pandoro mold is thoroughly greased with butter and dusted with flour, making sure to get into all the crevices for that iconic star shape.
- Place the dough ball into the prepared pandoro mold, seam-side down. Cover the mold loosely with plastic wrap or a damp tea towel.
- Let it proof in a warm, draft-free place for 2-4 hours, or until the dough has almost reached the top of the mold. The exact time will depend on your kitchen temperature. This final rise is crucial; over-proofing in warm conditions can lead to a collapsed structure.
- Preheat your oven to 350°F (175°C) about 20 minutes before baking. Ensure oven temperature is stable – using an oven thermometer is highly recommended.
- Bake for 35-45 minutes. The Pandoro should be golden brown on top. To check for doneness, an instant-read thermometer inserted into the center should register an internal temperature of 200°F (93°C). Avoid opening the oven door too early, as this can affect the rise.
Phase 5: Cooling and Unmolding
- Once baked, carefully remove the Pandoro from the oven. Let it cool in the mold on a wire rack for 10-15 minutes.
- After cooling slightly, invert the mold onto the wire rack and gently unmold the Pandoro. If you’ve dusted the mold carefully, it should release easily. Not letting it cool completely before unmolding is a common mistake that can lead to sticking or collapsing.
- Allow the Pandoro to cool completely on the wire rack before dusting with icing sugar and serving. This can take several hours.
Mastering the Pandoro Rise & Shape
Creating that majestic, fluffy star is part of the magic of this christmas pandoro recipe. It requires a bit of finesse, but with these tips, you’ll achieve perfection.
Achieving the Iconic Star Shape
The distinct star shape of Pandoro comes from its specialized pandoro mold. Proper preparation of this mold is critical for a beautiful, intact finish. I always recommend thoroughly greasing the mold with softened butter, ensuring every nook and cranny is coated. Then, dust generously with flour, tapping out any excess. This meticulous step prevents sticking and ensures your Pandoro slides out effortlessly, revealing its perfect star shape. When placing the dough, shape it into a smooth, taut ball before setting it seam-side down in the mold. This encourages an even rise and expansion into all points of the star. Allow it to cool sufficiently in the mold after baking before attempting to unmold, as this helps the structure firm up.
Ensuring a Perfect Rise
Pandoro, like all sweet leavened bread, depends heavily on a successful rise. Our recipe incorporates two main rising stages: the initial bulk fermentation and the final proof in the mold. The initial bulk fermentation allows for robust gluten development and flavor. The ideal ambient temperature for rising is around 70-75°F (21-24°C). However, our unique twist, the overnight cold fermentation, contributes significantly to a more controlled and robust final rise by developing strength and flavor slowly. For the final proof in the mold, patience is paramount. You’ll know it’s ready when the dough has almost reached the top of the mold, looking domed and airy. Visual cues are key here – don’t let it over-proof, which can lead to a delicate structure that collapses in the oven. Under-proofing, conversely, results in a dense crumb.
Troubleshooting
If your dough doesn’t rise as expected, several factors could be at play. The most common issues are inactive yeast (ensure it’s fresh and bloomed), incorrect dough temperature (too cold or too hot can hinder yeast activity), or a drafty environment during proofing. For any sweet leavened bread, consistency in temperature and attention to yeast activity are your best friends.
Pro Tips & Troubleshooting
Even for experienced bakers, making a rich, delicate treat like Pandoro can present a few challenges. Here are my top tips and common pitfalls to avoid for your best christmas pandoro recipe yet.
Pro Tips
- Use Good Quality Butter for Flavor: Since Pandoro is a butter dough, the quality of your butter shines through. Invest in a good European-style unsalted butter for superior flavor and texture.
- Don’t Rush the Rising Stages, Especially Cold Proof: Patience is truly a virtue here. The slow, overnight cold fermentation is crucial for flavor development and a tender crumb. Rushing will compromise the final result.
- Ensure Oven Temperature is Stable: Use an independent oven thermometer to verify your oven’s accuracy. A stable, consistent temperature is vital for even baking and a beautiful rise.
- Dust Mold with Flour Carefully: To ensure that iconic star shape releases cleanly, meticulously butter and flour every crevice of your pandoro mold.
- Bring Eggs and Butter to Room Temperature: This ensures proper emulsification and integration into the dough, leading to a smoother texture and better rise.
- Start Your Cold Fermentation on Time: Plan your baking schedule to allow for the full 8-12 hours of cold fermentation. It’s the secret to the best flavor and ease of handling.
Common Mistakes to Avoid
- Under-kneading: This is a common pitfall. The dough needs to be kneaded long enough for full gluten development, which creates that desirable airy, elastic texture.
- Over-proofing in Warm Conditions: While the dough needs to rise, letting it go too long, especially in a warm environment, can cause it to collapse in the oven or develop an overly yeasty flavor.
- Opening the Oven Door Too Early: Resist the urge! Opening the oven door during the initial baking phase can cause a sudden drop in temperature, preventing the Pandoro from setting its rise.
- Not Letting It Cool Completely Before Unmolding: Warm Pandoro is delicate and prone to sticking or collapsing if removed from the mold too soon. Give it ample time to cool.
- Using Old Yeast: Always check the expiration date of your yeast. Inactive or old yeast is the number one reason for a poor rise.
- Not Thoroughly Greasing the Pandoro Mold: A poorly greased mold will cause your beautiful star-shaped bread to stick, ruining its presentation upon unmolding.
Serving & Storage
Once your magnificent Pandoro is baked, the enjoyment truly begins. Here’s how to best serve and store your homemade masterpiece.
Serving Ideas
Pandoro is traditionally served simply, allowing its delicate flavor to shine.
- Traditional Dusting: The classic presentation involves dusting it generously with icing sugar, creating a beautiful “snow-capped” effect that’s perfect for Italian Christmas traditions.
- Coffee & Hot Chocolate: Enjoy slices alongside a steaming cup of espresso, cappuccino, or rich hot chocolate for a cozy holiday treat.
- Creamy Pairings: For a more decadent experience, serve with custards like zabaglione, a light mascarpone cream, or even a dollop of whipped cream.
- Creative Presentation: For a show-stopping dessert, slice the Pandoro horizontally to create star-shaped layers. You can then fill these layers with fruit, cream, or a chocolate ganache before reassembling. It’s a fantastic idea for holiday desserts!
Storage and Make-Ahead
This christmas pandoro recipe can easily be made ahead and stored, making holiday entertaining a breeze.
* Room Temperature Storage: Freshly baked Pandoro is best enjoyed within 3-5 days. Store it at room temperature in an airtight container or a large zip-top bag to maintain its freshness and prevent it from drying out.
* Freezing Baked Pandoro: Pandoro freezes beautifully! For best results, ensure the loaf is completely cool. Wrap the entire loaf tightly in plastic wrap, then again in aluminum foil, or place individual slices in freezer-safe bags. It can be frozen for up to 3 months. Thaw at room temperature overnight, or gently warm slices in a low oven for a few minutes. This makes it an excellent option for holiday desserts.
* Make-Ahead Dough: Our unique overnight cold fermentation is the primary make-ahead strategy for the dough itself. This not only builds flavor but also allows you to split the preparation over two days, making the process much more manageable.
Adaptations for Holiday Gifting
A homemade Pandoro makes for a truly thoughtful and impressive gift, embodying the spirit of gifting homemade food.
* Beautiful Wrapping: Once completely cool, place your Pandoro in a clear cellophane bag and tie it with a festive ribbon. You can also find beautiful specialty Pandoro boxes online.
* Include Serving Instructions: Attach a small card with serving suggestions (like dusting with icing sugar or pairing with coffee) and storage tips.
* Personal Touch: Emphasize that it’s a homemade Italian Christmas bread, baked with love, making it an even more special present.
Conclusion
There’s nothing quite like the aroma of homemade Pandoro filling your kitchen, especially during the holidays. This authentic christmas pandoro recipe, with its revolutionary overnight cold fermentation, delivers a treat that is incredibly fluffy, flavorful, and surprisingly manageable to create. While sweet leavened bread projects might seem daunting, I promise you, the joy and pride of pulling this golden star from your oven are immeasurable. So, embrace the tradition, trust the process, and let this beautiful Pandoro become a cherished part of your Italian Christmas traditions. Try this recipe, share your creations, and explore other delightful holiday desserts here!
FAQ
- What is the best way to store homemade Pandoro?
- To keep your homemade Pandoro fresh, store it in an airtight container or a large zip-top bag at room temperature. It will remain delicious for 3-5 days. For longer storage, it freezes wonderfully—wrap it tightly in plastic wrap and foil, and it will last for up to 3 months.
- How can I ensure my Pandoro rises properly?
- Proper rising depends on several factors: ensure your yeast is fresh and active (it should bloom and be foamy), maintain a warm, draft-free environment for proofing, and crucially, don’t rush the rising stages. Our overnight cold fermentation also contributes to a more controlled and robust final rise.
- Can I prepare Pandoro dough ahead of time?
- Absolutely! Our recipe incorporates an overnight cold fermentation, which is the perfect make-ahead method for the dough. This not only develops superior flavor and texture but also allows you to split the preparation over two days, making the process much more convenient.
- What do I serve with Pandoro?
- Pandoro is traditionally dusted with icing sugar to mimic snow. It pairs beautifully with coffee (especially espresso), hot chocolate, or a glass of dessert wine. For a richer treat, serve it alongside zabaglione, mascarpone cream, or even fresh berries.
- What’s the difference between Pandoro and Panettone?
- While both are iconic Italian Christmas breads, Pandoro and Panettone differ in shape, ingredients, and texture. Pandoro (meaning “golden bread”) is star-shaped, rich, dense, and boasts a brioche-like texture, typically flavored with vanilla and lemon zest, and contains no fruit. Panettone is dome-shaped, lighter, and traditionally filled with candied fruits and raisins.
- Is Pandoro difficult to make for a home baker?
- While Pandoro is a sweet leavened bread that requires patience and several steps, it is definitely achievable for a home baker! Our clear instructions and the benefit of the overnight cold fermentation make the dough easier to handle and the process less daunting. It’s a rewarding yeast baking project.
- Can I make Pandoro without a special mold?
- You can bake a rich, brioche-like sweet bread without a pandoro mold, but it won’t have the iconic star shape. You could use a large, straight-sided pan (like a soufflé dish) or even a bundt pan, but the distinctive star shape is part of the Pandoro’s charm and tradition.
Authentic Christmas Pandoro Recipe: Homemade, Fluffy & Easy
Ingredients
Equipment
Method
- In a small bowl, combine the warm milk (ensure it's lukewarm, about 105-115°F or 40-46°C, to not kill the yeast) with the fresh or active dry yeast and a pinch of granulated sugar. Let this mixture bloom for 10 minutes until it's foamy and fragrant, indicating the yeast is active.
- In the bowl of a stand mixer fitted with the dough hook, combine 100g of the '00' flour with 50g of sugar and the activated yeast mixture. Mix on low speed until just combined. This forms a soft, sticky starter dough.
- Cover the bowl with plastic wrap and let it rise in a warm place for 1.5-2 hours, or until it has visibly doubled in size and looks bubbly. Don't rush the rising stages; patience is key to developing flavor and texture.
- To the risen starter dough, add the remaining 150g '00' flour, 50g sugar, 2 of the room temperature eggs, and the salt. Knead on medium speed for 10-15 minutes until the dough comes together and is smooth and elastic. Under-kneading is a common mistake, preventing full gluten development vital for a light texture.
- Gradually add the softened unsalted butter, one tablespoon at a time, allowing each addition to be fully incorporated before adding the next. This process can take another 10-15 minutes. The dough will look glossy and sticky but should pull away from the sides of the bowl.
- Scrape in the vanilla bean seeds (or add vanilla extract) and the lemon zest. Knead for a final 2-3 minutes until everything is evenly distributed. You should have a very soft, elastic, and rich butter dough.
- Lightly oil a large bowl. Transfer the Pandoro dough into it, turning once to coat. Cover tightly with plastic wrap.
- Place the covered bowl in the refrigerator for 8-12 hours, or preferably overnight. This overnight cold fermentation is our unique twist! This slow, cold proof significantly develops the complex flavors and creates that incredibly tender, airy crumb. It also makes the rich dough much easier to handle later.
- The next day, remove the dough from the refrigerator. Punch it down gently and shape it into a smooth ball. Ensure your pandoro mold is thoroughly greased with butter and dusted with flour, making sure to get into all the crevices for that iconic star shape.
- Place the dough ball into the prepared pandoro mold, seam-side down. Cover the mold loosely with plastic wrap or a damp tea towel.
- Let it proof in a warm, draft-free place for 2-4 hours, or until the dough has almost reached the top of the mold. The exact time will depend on your kitchen temperature. This final rise is crucial; over-proofing in warm conditions can lead to a collapsed structure.
- Preheat your oven to 350°F (175°C) about 20 minutes before baking. Ensure oven temperature is stable – using an oven thermometer is highly recommended.
- Bake for 35-45 minutes. The Pandoro should be golden brown on top. To check for doneness, an instant-read thermometer inserted into the center should register an internal temperature of 200°F (93°C). Avoid opening the oven door too early, as this can affect the rise.
- Once baked, carefully remove the Pandoro from the oven. Let it cool in the mold on a wire rack for 10-15 minutes.
- After cooling slightly, invert the mold onto the wire rack and gently unmold the Pandoro. If you've dusted the mold carefully, it should release easily. Not letting it cool completely before unmolding is a common mistake that can lead to sticking or collapsing.
- Allow the Pandoro to cool completely on the wire rack before dusting with icing sugar and serving. This can take several hours.
Notes
Printable Recipe Card
Want just the essential recipe details without scrolling through the article? Get our printable recipe card with just the ingredients and instructions.