Skip to content
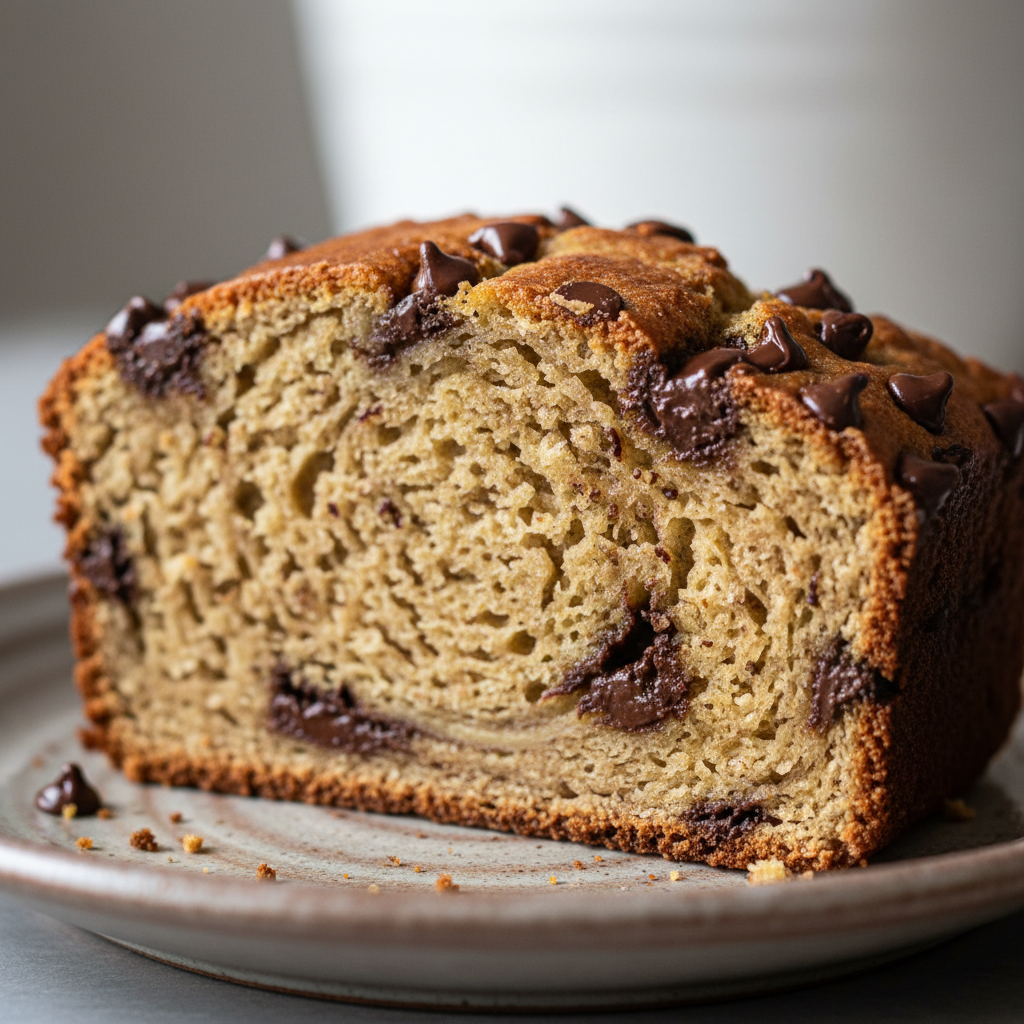
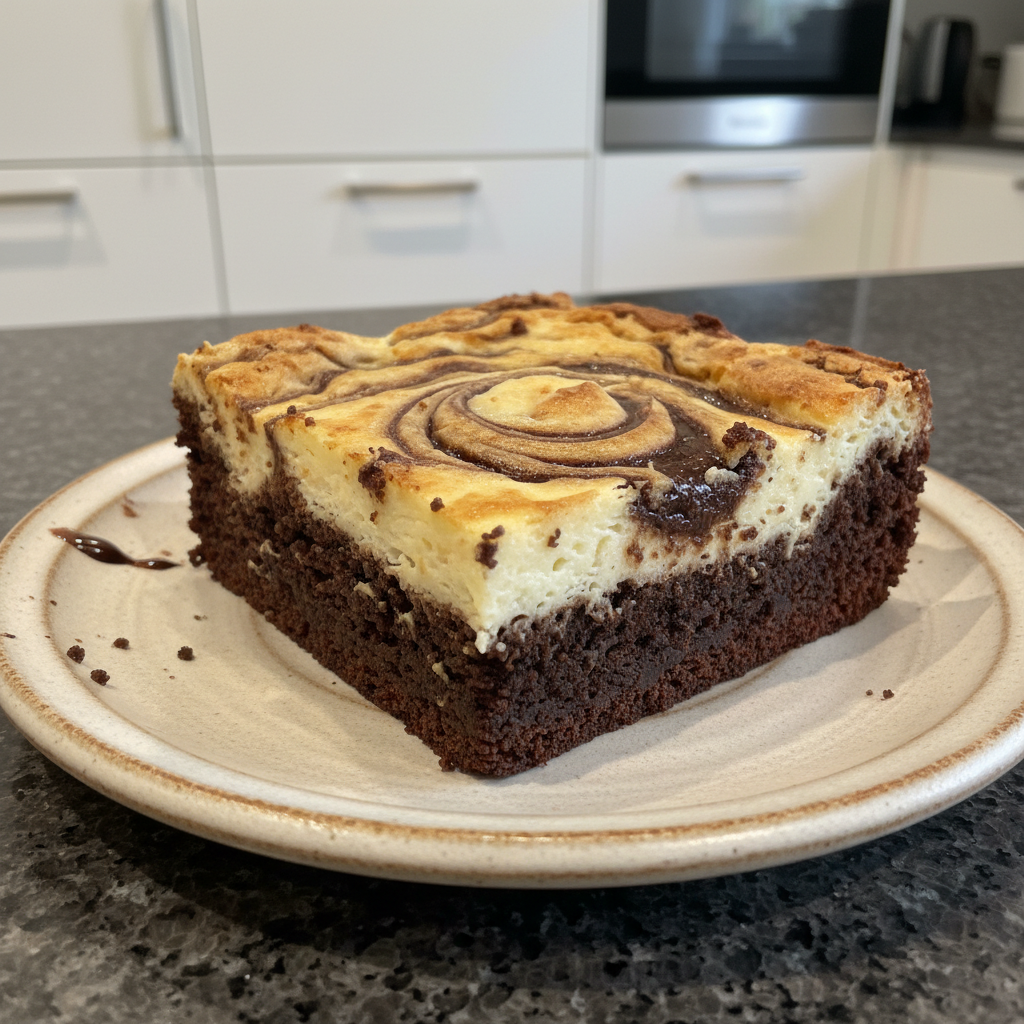
 Oh, the sublime joy of a truly great brownie! But what if I told you we could take that experience to an entirely new level of decadence? Welcome to my kitchen, where today we’re diving into the irresistible world of fudgy cream cheese brownies. Imagine an intensely rich, dark chocolate brownie base crowned with a luscious, tangy cheesecake swirl, all in one perfect bite. This isn’t just any brownie recipe; it’s a journey to crafting the ultimate sweet treat, promising perfectly set layers, beautiful, defined cheesecake ripples, and a foolproof method that will make you a baking hero. Get ready to bake bliss and impress everyone!
Why You’ll Love This Recipe
I know what you’re thinking: “Are these really different from other cream cheese brownies?” And my answer is a resounding YES! My recipe incorporates a couple of unique twists that elevate these from good to absolutely unforgettable, making them stand out in both flavor and presentation.
Deepened, Richer Chocolate Flavor: My secret weapon for achieving an intensely chocolatey brownie isn’t more chocolate, but a little kitchen magic! By incorporating just 1-2 teaspoons of espresso powder into the brownie batter, we significantly amplify the natural depth of the chocolate. This isn’t about adding a coffee taste; it’s a clever flavor pairing trick that makes the chocolate notes sing even louder, resulting in an incredibly rich and satisfying brownie base.
Perfectly Fudgy Texture & Set Layers: No one wants a raw middle or crumbly layers. My innovative two-stage chilling process is key here: initial room temperature cooling, followed by extended refrigeration, and then a brief freezer chill. This meticulous method ensures both the fudgy brownie base and the creamy cheesecake layer are fully set. The result is an ideal, dense, and moist texture throughout, preventing any dreaded raw centers or structural issues.
Exceptionally Clean & Defined Swirls: The beauty of a cream cheese brownie is in its swirl, and this recipe guarantees stunning visuals. The precise two-stage chilling process isn’t just for texture; it allows for beautifully sharp, non-crumbly cuts. You’ll be able to showcase elegant cream cheese swirls with pristine definition, enhancing both the visual appeal and the eating experience. They look as good as they taste!
Reliable & Impressive Results: I’ve fine-tuned this recipe to address common baking pitfalls, providing a foolproof path to consistently superior cream cheese brownies. Whether you’re a seasoned baker or an ambitious beginner, this recipe is guaranteed to impress, delivering a perfectly balanced, fudgy, and visually appealing sweet treat every time.
Ingredients Needed

Here’s what you’ll need to create these marvelous fudgy cream cheese brownies:
- 12 tablespoons unsalted butter (cut into tablespoon-sized pieces)
- ½ cup semisweet chocolate chips
- ½ cup unsweetened cocoa powder
- 1 cup granulated sugar
- ½ cup brown sugar (light or dark, packed)
- 2 large eggs
- 1 egg yolk
- 1 teaspoon vanilla extract
- ½ teaspoon salt
- 1-2 teaspoons instant espresso powder (for unique twist)
- 1 cup all-purpose flour
For the Cream Cheese Topping:
- 8 ounces cream cheese (softened to room temperature)
- ¼ cup granulated sugar
- 1 large egg
- ½ teaspoon vanilla extract
Ingredient Notes & Substitutions
Understanding your ingredients is key to baking success! Here are a few insights into what makes these cream cheese brownies so special:
- Unsalted Butter: I always recommend using unsalted butter. This gives you complete control over the total salt content in your recipe. A good quality butter will also enhance the richness of your brownies.
- Semisweet Chocolate Chips & Unsweetened Cocoa Powder: For truly deep chocolate flavor, the quality of your chocolate matters. I prefer a good semisweet chocolate chips for a balanced sweetness and a natural unsweetened cocoa powder for that intense, fudgy brownie flavor. These combine beautifully to create a complex chocolate base.
- Granulated & Brown Sugar: The combination of these two sugars is intentional. Granulated sugar provides structure and sweetness, while brown sugar (light or dark, packed) adds essential moisture and a lovely chewiness, contributing significantly to that desirable fudgy texture.
- Large Eggs & Egg Yolk: The two large eggs provide structure and richness, but the extra egg yolk is a secret weapon! It adds an extra boost of fat and emulsifiers, making these brownies incredibly fudgy, dense, and chewy.
- Vanilla Extract & Salt: These might seem like small additions, but they play crucial roles. Vanilla extract enhances and rounds out all the other flavors, while salt balances the sweetness and brings out the chocolate notes.
- All-Purpose Flour: For consistent results, it’s always helpful to measure your all-purpose flour correctly. Spooning it into your measuring cup and then leveling it off (or better yet, using a kitchen scale) prevents over-measuring, which can lead to dry brownies.
- Cream Cheese: This is a critical ingredient for the luscious swirl! You absolutely must use full-fat cream cheese (8 ounces) and ensure it’s softened *completely* to room temperature. This is the secret to a perfectly smooth, lump-free cheesecake swirl. Avoid low-fat versions, as they can significantly impact the texture and how well the cheesecake layer sets.
- Espresso Powder (Unique Twist): As I mentioned, the espresso powder is a game-changer for amplifying chocolate flavor, not for adding a coffee taste. Instant espresso powder or very finely ground dark roast coffee will work wonders here. It’s a subtle but powerful enhancer.

How to Make Fudgy Cream Cheese Brownies
Let’s get baking! Follow these steps carefully to achieve those perfect fudgy cream cheese brownies with stunning swirls.
Phase 1: Preparing the Brownie Batter
- First, I always begin by preheating my oven to 350°F (175°C). Then, I grab my trusty metal 7×11-inch pan and spray it generously with baking spray. Lining it with parchment paper that overhangs the sides will also make removal and cutting incredibly easy later!
- In a large, microwave-safe bowl, I combine the unsalted butter (cut into tablespoon-sized pieces) and the semisweet chocolate chips.
- Next, I microwave this mixture for 30 seconds. I take it out, stir it well until it starts to look glossy and cohesive, and then microwave it again for another 15 seconds. I stir well once more, repeating these short 15-second intervals until the chocolate and butter are completely melted and beautifully combined into a smooth, shiny mixture.
- Now, I stir in the unsweetened cocoa powder until it’s fully incorporated, making a thick, rich chocolate paste.
- I add both the granulated sugar and brown sugar to the chocolate mixture, stirring vigorously until they are completely combined and the mixture is thick and luscious.
- Then, I add the large eggs, one at a time, followed by the extra egg yolk, stirring well after each addition until fully integrated. The batter will become glossy and slightly lighter in color.
- I stir in the vanilla extract, salt, and that special instant espresso powder now, ensuring all the flavors are ready to meld.
- Finally, I add the all-purpose flour and stir just until it’s completely combined and no streaks of flour remain. Be careful not to overmix here!
- I reserve about ¼ cup of this rich brownie batter for the swirl. The remaining batter I spread evenly into my prepared 7×11-inch pan, creating a smooth, dark base.
Phase 2: Crafting the Cream Cheese Swirl
- Now it’s time to prepare the luscious cheesecake topping. In a medium-sized bowl, I combine the softened cream cheese and ¼ cup of granulated sugar.
- Using my electric mixer, I beat these ingredients until they are perfectly creamy and smooth, with no lumps in sight. This step is crucial for a velvety cheesecake layer.
- I stir in the remaining large egg and vanilla extract until well-combined, making a light, pourable cheesecake batter.
Phase 3: Assembling and Baking
- Gently, I pour the creamy cheesecake mixture evenly over the brownie batter in the pan.
- Next, I take my reserved ¼ cup brownie batter. If it has stiffened up a bit, I just give it a quick stir with a spoon to loosen it. Then, I dollop or drizzle this brownie batter over the cheesecake layer.
- Using a knife or a skewer, I gently swirl the brownie batter and cheesecake together. Don’t overdo it; a few elegant strokes will create those beautiful marbled swirls.
- I place the pan into the preheated 350°F oven and bake the brownies for 25-30 minutes. I look for the center to be set; a toothpick inserted into the center should come out mostly clean with a few fudgy crumbs attached. The cream cheese layer should appear opaque and lightly golden, not jiggly or wet.
- This is perhaps the most important step for ultimate fudginess and clean cuts: I allow the brownies to cool COMPLETELY at room temperature first. Then, I refrigerate them for at least 2 hours until thoroughly chilled. For those extra pristine slices and defined swirls, I pop them into the freezer for 15-20 minutes just before cutting and serving. This two-stage chilling process is my unique twist for truly perfect cream cheese brownies!
Mastering the Bake: Doneness & Pan Considerations
Baking brownies can feel like a delicate art, especially when you have a creamy cheesecake layer involved. Here’s my expert advice to ensure your cream cheese brownies turn out perfectly every time.
Choosing the Right Pan & Adjusting Bake Time
The type and size of your baking pan can significantly impact your brownies. I’ve found that a metal 7×11-inch pan is ideal for this recipe, giving you that perfect thickness and excellent heat distribution. Metal pans heat up quickly, helping to create crisp edges and a wonderfully fudgy center.
- Metal vs. Glass: While metal pans are my go-to, if you’re using a glass pan, remember that glass retains heat longer. This can sometimes lead to slightly drier edges or overbaking if you don’t adjust. I recommend reducing your oven temperature by about 25°F (e.g., to 325°F) or checking for doneness a few minutes earlier.
- Pan Size Impact: For those wondering, “What size pan should I use?” or “Can I use a 9×9 inch pan?” – yes, you can! If you use a 9×9-inch pan, your brownies will be slightly thicker, so you might need to add an extra 5-10 minutes to the baking time. If you opt for a 9×13-inch pan, your brownies will be thinner, and the baking time will likely be reduced by about 5-10 minutes. Always keep an eye on them! I strongly advise against using excessively large pans, as this can result in very thin brownies that cook unevenly, often leading to raw centers and dry edges, one of the most common baking mistakes.
- Oven Calibration: Ovens can sometimes have “hot spots” or fluctuate in temperature. If you find your bakes are consistently off, investing in an inexpensive oven thermometer can be a game-changer for accuracy.
Visual Cues for Perfect Doneness
Beyond the simple toothpick test, there are a few other visual cues that tell me my cream cheese brownies are perfectly baked, especially with that delicate cheesecake ripple on top.
- The Toothpick Test: For a fudgy brownie, the toothpick inserted into the center should come out mostly clean but with a few moist, fudgy crumbs attached. If it comes out wet with raw batter, it needs more time. If it comes out completely clean, it might be slightly overbaked for true fudginess.
- Cream Cheese Layer: The cheesecake layer should look opaque and lightly golden around the edges. When gently jiggled, the very center might have a slight, barely perceptible wobble, but it should not appear liquid. It should mostly be set.
- Brownie Edges: The edges of the brownie base should appear set and slightly puffed, pulling away just a tiny bit from the sides of the pan.
- Preventing Raw Centers: To avoid a raw middle section, ensure your oven temperature is accurate (an oven thermometer helps!), use the recommended pan size or adjust baking time accordingly, and always trust those visual cues. Patience is key; don’t pull them out too early!
Troubleshooting Stiff Batter for Swirling
Sometimes, the reserved brownie batter for swirling can become a bit stiff while waiting. If your brownie batter consistency makes it difficult to drizzle and swirl, don’t worry!
- Quick Fix: You can gently warm the reserved batter for just a few seconds (5-10 seconds) in the microwave to loosen it up. Alternatively, a vigorous stir with a spoon will often make it pliable enough to work with again, ensuring you get those beautiful, defined swirls.
Pro Tips & Troubleshooting
Even seasoned bakers appreciate a few expert insights! Here are my top tips for absolute perfection and how to avoid common pitfalls when making these irresistible cream cheese brownies.
Pro Tips for Perfect Cream Cheese Brownies
- Room Temperature Cream Cheese is Non-Negotiable: I cannot stress this enough! Starting with truly softened cream cheese is the absolute secret to a perfectly smooth, lump-free cheesecake swirl. If it’s cold, you’ll end up with stubborn little lumps that won’t blend away, so plan ahead and let it sit out for at least an hour.
- Electric Mixer for Cream Cheese: For that velvety smooth cream cheese layer, use an electric mixer. It ensures the cream cheese, sugar, and egg are beaten until beautifully creamy and smooth, preventing any unsightly lumps.
- Parchment Paper Liner: My favorite trick for easy removal and pristine slices is to line your baking pan with parchment paper, leaving an overhang on the sides. Once cooled, you can simply lift the entire slab of brownies out onto a cutting board for effortless, clean cutting.
- The Power of Chilling: Remember my unique two-stage chilling process? It’s the secret to firm, fudgy brownies with defined swirls and pristine cuts. Patience truly is a virtue here; resisting the urge to cut warm brownies pays off handsomely.
- Warm, Clean Knife: To achieve those perfectly neat slices, run a sharp knife under hot water and wipe it completely dry between each cut. This creates a clean incision through both the brownie and cheesecake layers, preventing drag and crumbs.
- Swirling Technique: When creating your cheesecake ripple, use a gentle, purposeful swirling motion with your knife. Aim for beautiful marbling without overmixing the layers, which could create a muddy appearance. A few careful passes are all you need.
Common Mistakes to Avoid
Even the best recipes can go awry if we’re not careful. Here are the common blunders I see, and how to steer clear of them:
- Cutting Brownies Too Soon: This is probably the number one mistake! Cutting brownies before they are completely cooled and, more importantly, thoroughly chilled (especially after the freezer stage of my unique twist) will result in messy, crumbly slices and undefined swirls. Resist the urge!
- Using the Wrong Pan Size: While you can adjust the pan size, using a pan much larger than the recommended 7×11 inch (without adjusting the recipe or bake time) is a common pitfall. It can lead to thinner brownies that cook unevenly, often resulting in a raw center and dry, hard edges.
- Underbaking: Not baking long enough is another culprit for a disappointing batch. Underbaking results in a raw, unset middle section, particularly affecting the cream cheese layer. Refer back to my detailed doneness cues in Section 5 to ensure your brownies are perfectly cooked through.
- Overmixing the Brownie Batter (After Flour): Once you add the flour, mix just until no dry streaks remain. Overmixing develops gluten, which can lead to tougher, more cake-like brownies rather than the desired dense, fudgy texture.
Serving & Storage
You’ve baked up a masterpiece! Now, let’s talk about how to enjoy every last fudgy, swirled bite and keep them fresh.
Serving Ideas
These cream cheese brownies are a dessert star on their own, but a few simple additions can elevate them even further:
- Classic Indulgences: Serve these rich brownies slightly warm with a generous scoop of vanilla ice cream, a dollop of homemade whipped cream, or a decadent drizzle of warm chocolate syrup.
- Garnishes & Mix-ins: For a textural contrast and extra flair, consider optional garnishes like chopped walnuts, pecans, or even colorful sprinkles for a festive touch. You can also add extra chocolate chips or nuts directly into the brownie batter during step 8 for an added surprise.
- Pairing Suggestions: The richness of these brownies pairs beautifully with a tall glass of cold milk or a hot cup of coffee, bringing out their deep chocolate notes.
Storage and Make-Ahead
Proper storage is essential, especially with a fresh cream cheese layer!
- Optimal Storage: Due to the cream cheese layer, these brownies must be stored in an airtight container in the refrigerator. This will keep them fresh and safe to eat for 3-5 days. Leaving them at room temperature for extended periods is not recommended.
- Freezing Baked Brownies: Yes, you can absolutely freeze brownies! Once completely cooled and chilled, cut the brownies into individual squares. Place them in a single layer on a baking sheet and freeze until firm (about 1-2 hours). Then, transfer the frozen brownies to a freezer-safe bag or airtight container, separating layers with parchment paper. They will keep beautifully for up to 2-3 months for best quality.
- Thawing Instructions: To thaw, simply take the desired number of brownies out of the freezer. You can let them thaw in the refrigerator overnight or, if individually portioned, at room temperature for about 30-60 minutes for a quicker thaw.
- Make-Ahead Tips: If you’re wondering, “Can I prep cream cheese brownies the night before?” the answer is yes! You can prepare both the brownie batter and the cream cheese mixture ahead of time. Store them separately in airtight containers in the refrigerator overnight. When you’re ready to bake, let them sit at room temperature for about 20-30 minutes to take the chill off before assembling and baking as directed.
Conclusion
And there you have it – the secret to the most irresistible, fudgy cream cheese brownies you’ll ever bake! I truly believe that by incorporating the subtle magic of espresso powder for amplified chocolate flavor and our crucial two-stage chilling process for perfect texture and pristine swirls, we’ve created an unparalleled sweet treat. You now possess a fantastic recipe and valuable baking insights to confidently bake perfect, fudgy, and visually stunning cream cheese brownies every single time. So go ahead, preheat your oven, gather your ingredients, and prepare to delight your taste buds. I encourage you to try this recipe, experiment with your favorite serving ideas, and share your delicious creations with friends and family. Happy baking!
FAQ
What is the best pan size for cream cheese brownies and how does it affect baking time?
I recommend a metal 7×11-inch pan for this specific cream cheese brownies recipe, as it yields the ideal thickness and fudgy texture. Metal pans conduct heat efficiently, ensuring even baking. If you use a 9×9-inch pan, your brownies will be thicker and may need an additional 5-10 minutes of baking time. For a 9×13-inch pan, the brownies will be thinner, and baking time will likely decrease by 5-10 minutes. Always keep an eye on doneness cues and use an oven thermometer for accuracy, as oven temperatures can vary.
How do I prevent my cream cheese brownies from being raw in the middle?
To prevent a raw middle, ensure your oven temperature is accurate (use an oven thermometer!), and do not pull the brownies out too early. The center should be set, and a toothpick inserted should come out mostly clean with a few moist, fudgy crumbs. The cream cheese layer should look opaque and lightly golden, not liquid or excessively jiggly in the center.
How do you ensure a perfectly smooth, lump-free cheesecake swirl?
The key to a perfectly smooth, lump-free cheesecake swirl is to start with full-fat cream cheese that is completely softened to room temperature. Additionally, use an electric mixer to beat the cream cheese and sugar until it’s absolutely creamy and smooth before incorporating the egg and vanilla extract.
What are the best tips for cleanly cutting and serving fudgy cream cheese brownies?
My top tips for clean cuts involve patience and technique: First, allow the brownies to cool completely at room temperature, then refrigerate for at least 2 hours, and finally, pop them in the freezer for 15-20 minutes just before cutting. This two-stage chilling process is crucial. For actual cutting, line your pan with parchment paper for easy lifting, and use a sharp knife run under hot water and wiped dry between each cut.
Can I add extra mix-ins like chocolate chips or nuts to my cream cheese brownies?
Absolutely! I love adding extra texture and flavor. You can fold about ½ cup of extra chocolate chips, chopped walnuts, or pecans into the brownie batter during step 8 for an added treat. Just be mindful not to overmix the batter once these are added.
How should I properly store and freeze cream cheese brownies?
Due to the cream cheese layer, these brownies must be stored in an airtight container in the refrigerator for up to 3-5 days. To freeze, cut the chilled brownies into squares, flash freeze them on a tray until solid, then transfer to a freezer-safe bag or container, separated by parchment paper. They will keep for 2-3 months. Thaw them in the refrigerator overnight or at room temperature for individual portions.
Why do fudgy brownie recipes often omit leavening agents?
Fudgy brownie recipes, like this one, often omit leavening agents such as baking powder or baking soda because these agents introduce air and promote a cake-like, lighter texture. For a dense, rich, and incredibly fudgy brownie, we want to minimize air, which is why we rely on eggs for structure and chocolate/butter for density, resulting in that desirable chewy texture.
Can I prep cream cheese brownies the night before?
Yes, you can definitely prep some components the night before! You can prepare both the brownie batter and the cream cheese mixture, storing them separately in airtight containers in the refrigerator. When you’re ready to bake, let them sit at room temperature for about 20-30 minutes to take off the chill before assembling and baking as per the instructions.
Fudgy Cream Cheese Brownies with Perfect Swirls
Ingredients
Equipment
Method
- First, preheat your oven to 350°F (175°C). Spray a metal 7x11-inch pan generously with baking spray and line it with parchment paper, allowing it to overhang the sides for easy removal.
- In a large, microwave-safe bowl, combine the unsalted butter (cut into tablespoon-sized pieces) and the semisweet chocolate chips.
- Microwave this mixture for 30 seconds. Stir well until glossy, then microwave for another 15 seconds. Stir again, repeating these short 15-second intervals until the chocolate and butter are completely melted and smoothly combined.
- Stir in the unsweetened cocoa powder until it's fully incorporated, making a thick, rich chocolate paste.
- Add both the granulated sugar and brown sugar to the chocolate mixture, stirring vigorously until they are completely combined and the mixture is thick.
- Then, add the large eggs, one at a time, followed by the extra egg yolk, stirring well after each addition until fully integrated and the batter becomes glossy and slightly lighter.
- Stir in the vanilla extract, salt, and the instant espresso powder, ensuring all the flavors are ready to meld.
- Finally, add the all-purpose flour and stir just until it's completely combined and no streaks of flour remain. Be careful not to overmix.
- Reserve about ¼ cup of this rich brownie batter for the swirl. Spread the remaining batter evenly into your prepared 7x11-inch pan, creating a smooth, dark base.
- Now it's time to prepare the luscious cheesecake topping. In a medium-sized bowl, combine the softened cream cheese and ¼ cup of granulated sugar.
- Using an electric mixer, beat these ingredients until they are perfectly creamy and smooth, with no lumps in sight. This step is crucial for a velvety cheesecake layer.
- Stir in the remaining large egg and vanilla extract until well-combined, making a light, pourable cheesecake batter.
- Gently pour the creamy cheesecake mixture evenly over the brownie batter in the pan.
- Next, take your reserved ¼ cup brownie batter. If it has stiffened up a bit, give it a quick stir with a spoon to loosen it. Then, dollop or drizzle this brownie batter over the cheesecake layer.
- Using a knife or a skewer, gently swirl the brownie batter and cheesecake together. Don't overdo it; a few elegant strokes will create those beautiful marbled swirls.
- Place the pan into the preheated 350°F oven and bake the brownies for 25-30 minutes. The center should be set, a toothpick inserted into the center should come out mostly clean with a few fudgy crumbs, and the cream cheese layer should appear opaque and lightly golden, not jiggly or wet.
- This is perhaps the most important step for ultimate fudginess and clean cuts: allow the brownies to cool COMPLETELY at room temperature first. Then, refrigerate them for at least 2 hours until thoroughly chilled. For extra pristine slices and defined swirls, pop them into the freezer for 15-20 minutes just before cutting and serving. This two-stage chilling process is key for truly perfect cream cheese brownies!
Notes
Printable Recipe Card
Want just the essential recipe details without scrolling through the article? Get our printable recipe card with just the ingredients and instructions.